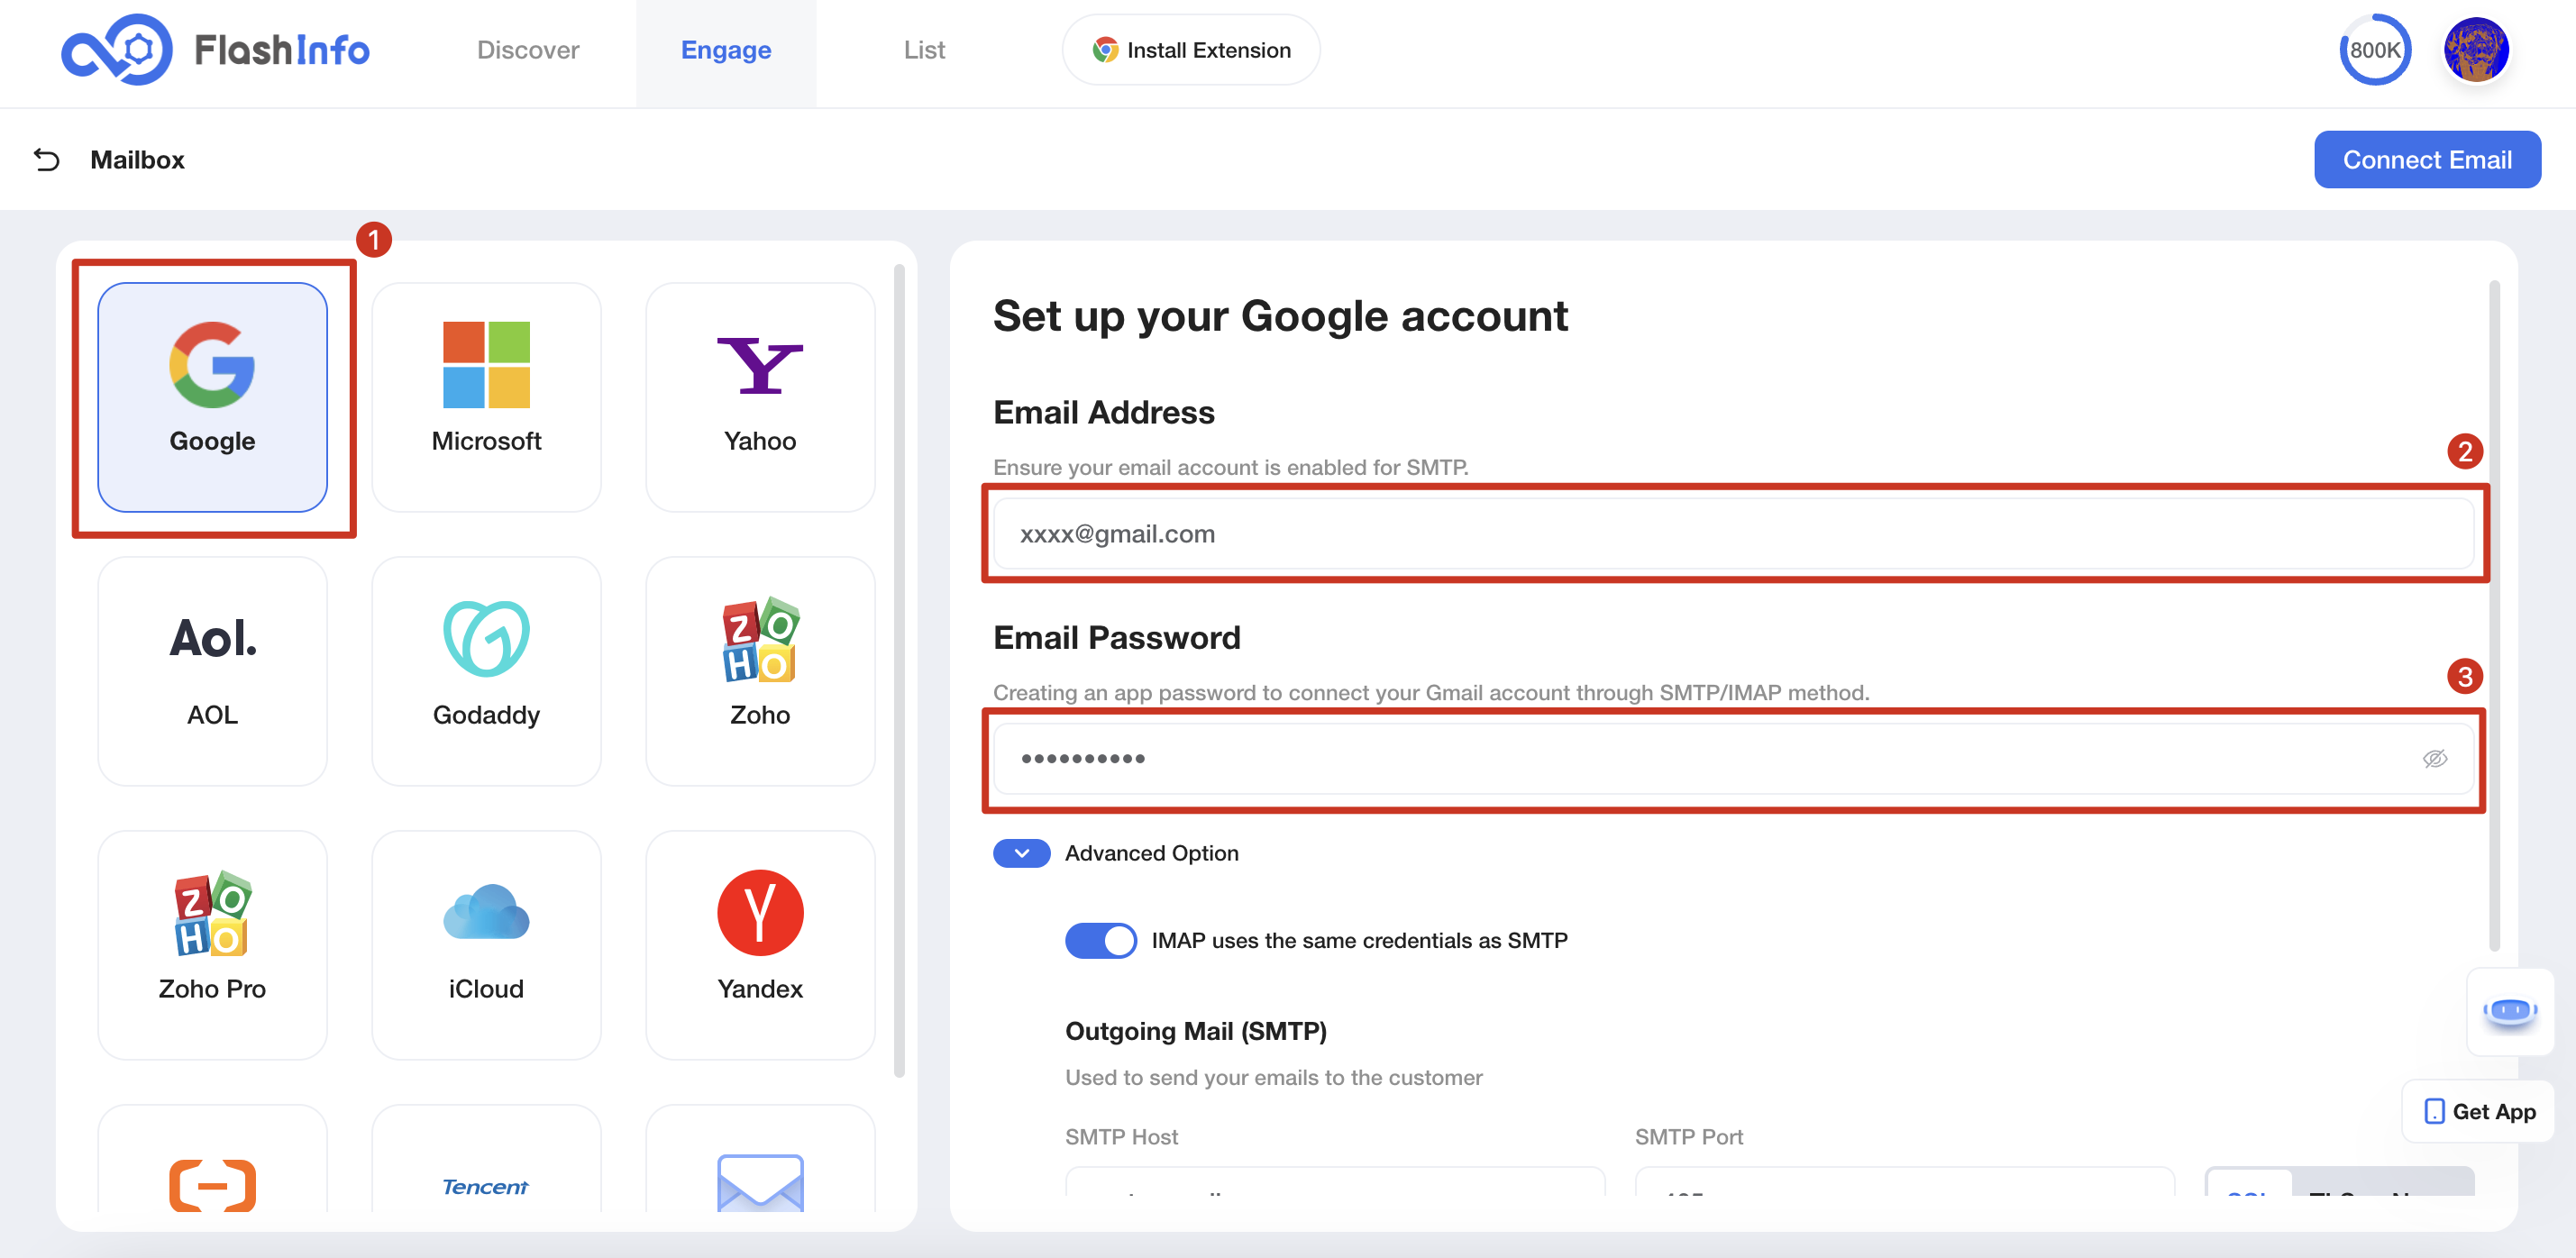
How to Connect Gmail?
This article introduces how to connect your Gmail to FlashInfo through SMTP/IMAP after setting up on Google, with pictures and text.
Welcome to free Gmail configuration 👋
STEP 1
In order to connect your Gmail, you first need to go to your Google account and enable two-factor authentication.
Make sure your two-factor authentication is turned on.

If it is turned off, please follow the steps below to turn it on.
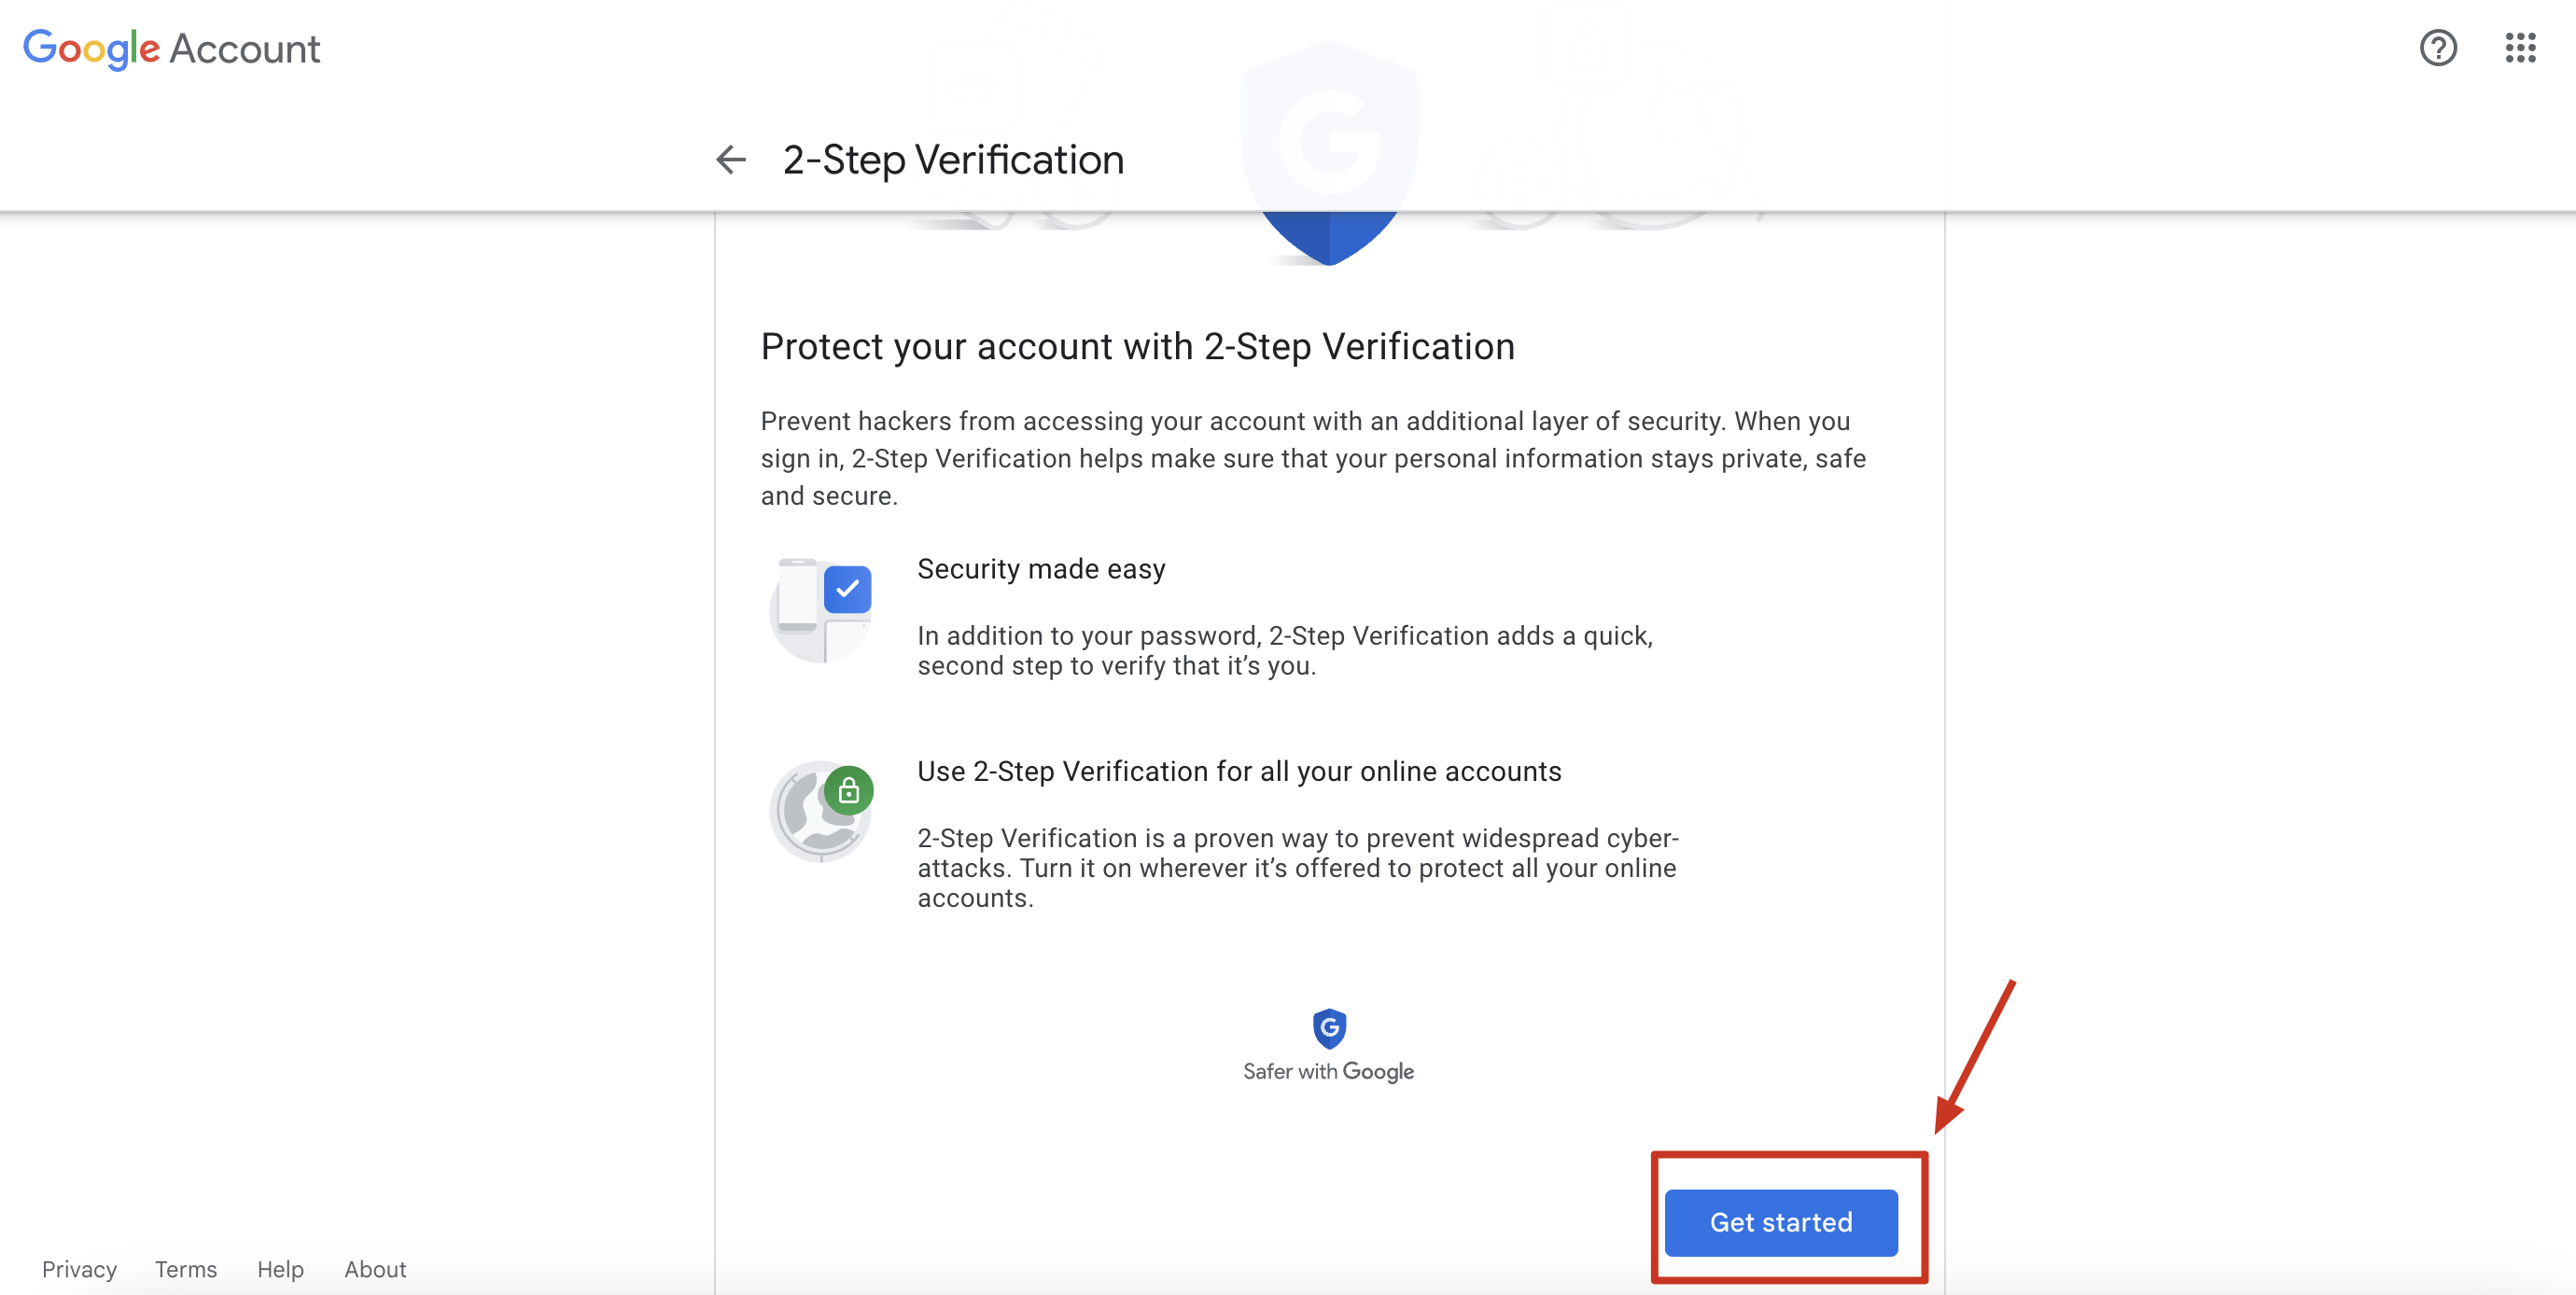
1)Click 2-Step Verification

2)Follow Google's guided process to complete the setup.
Step 2
Next, you need to generate an application password that you will use when connecting to FlashInfo
1)Click here to generate app password or follow the instructions below to operate.


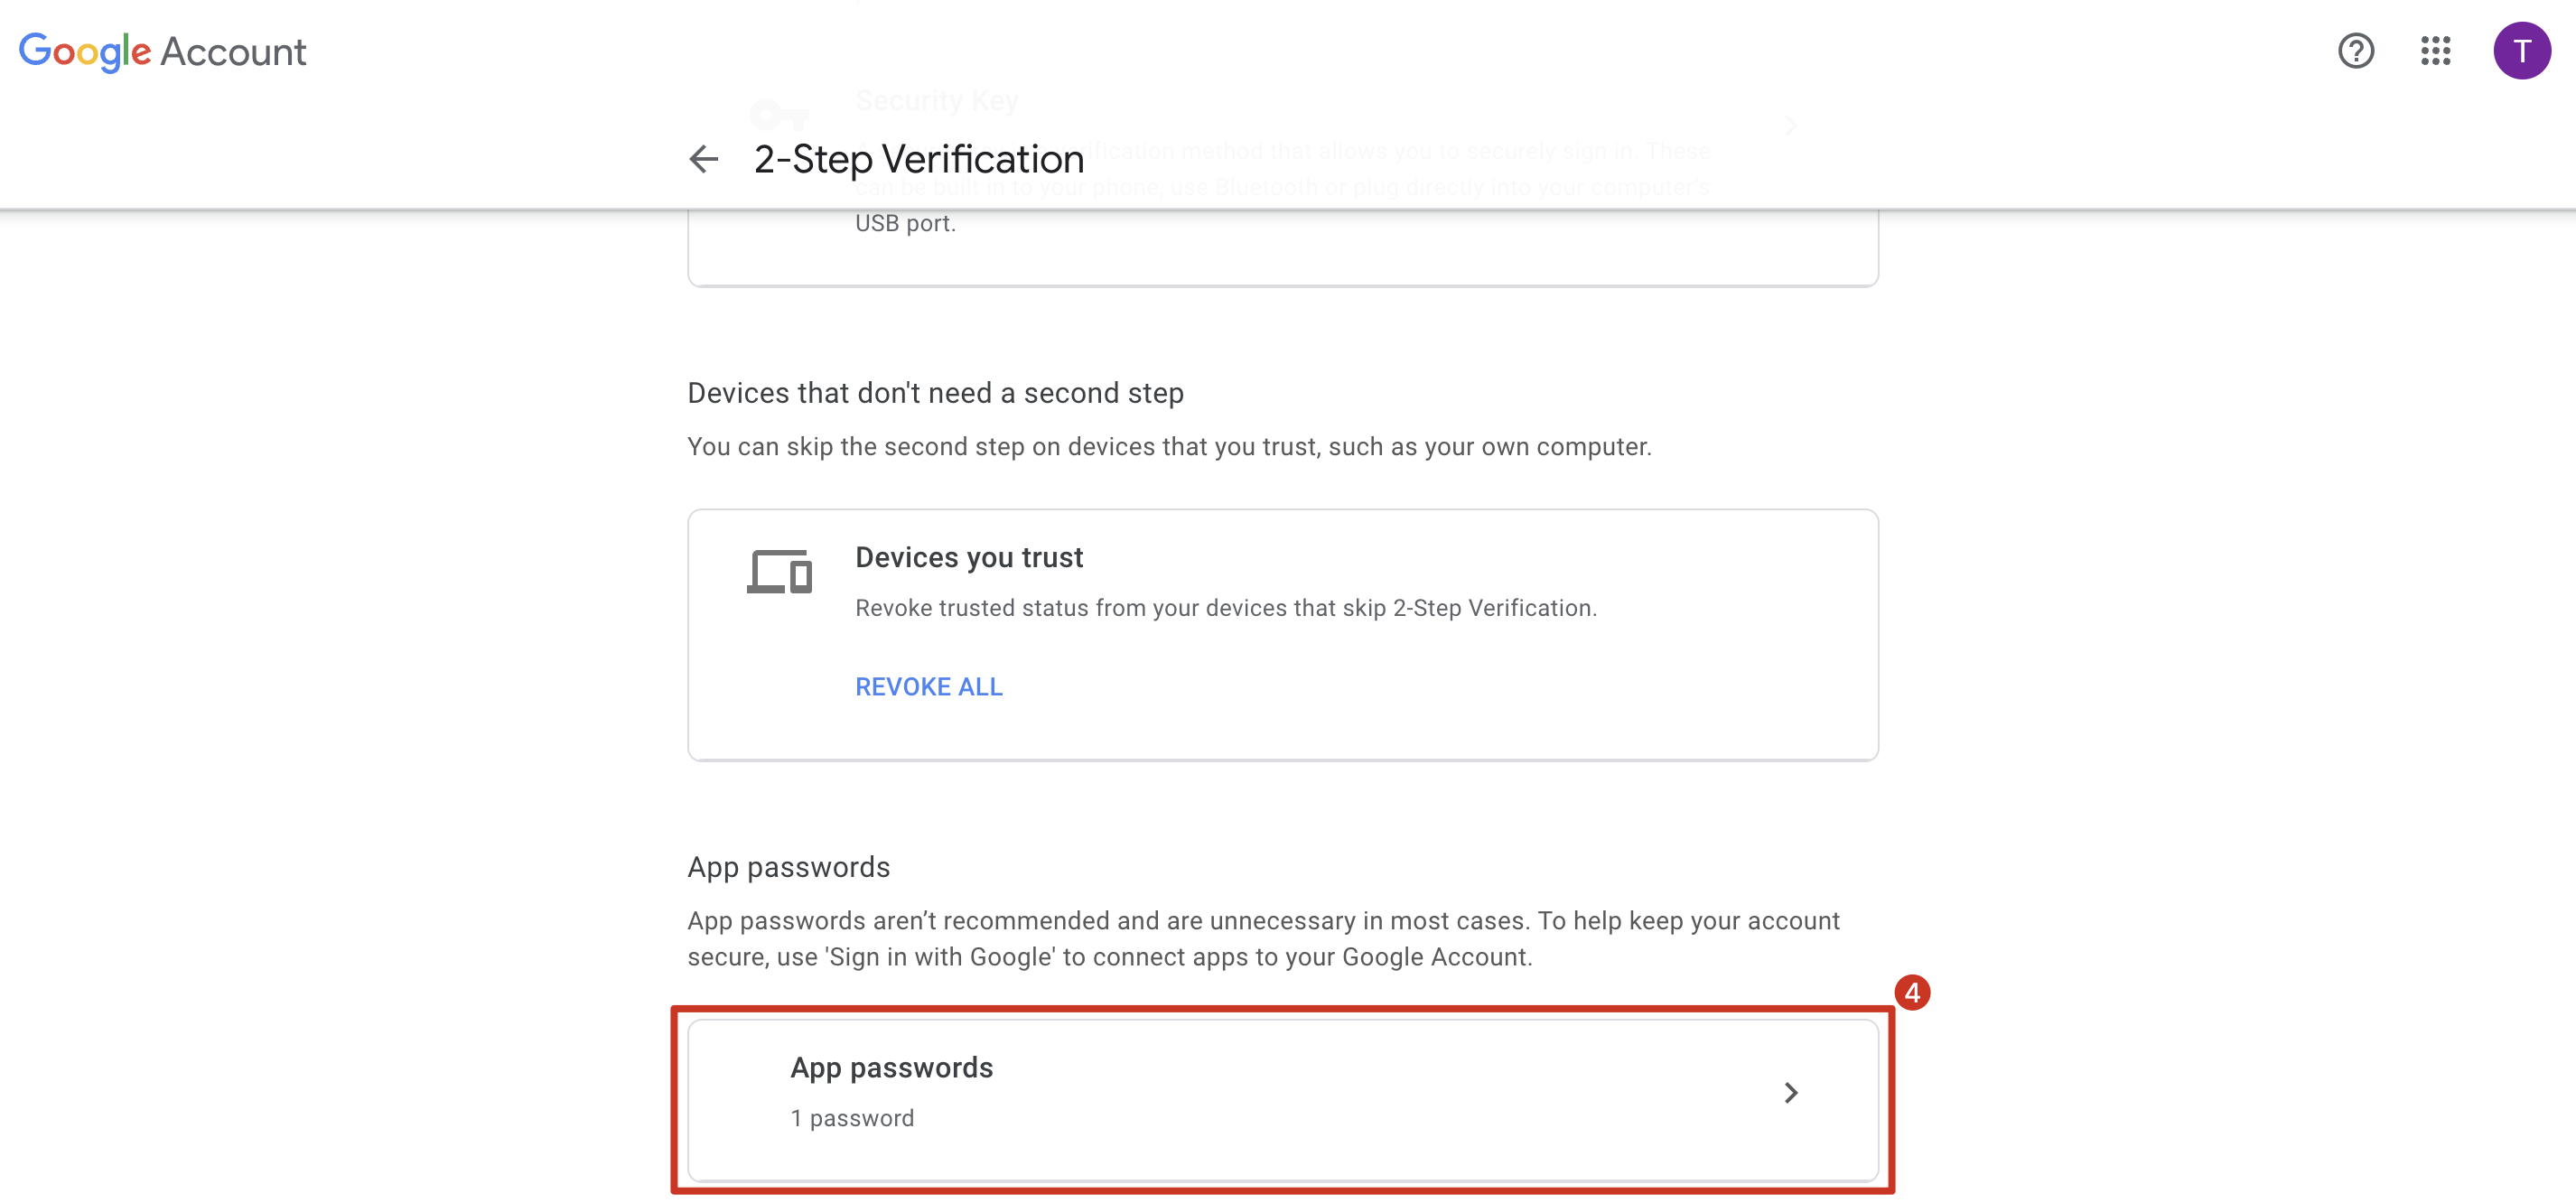
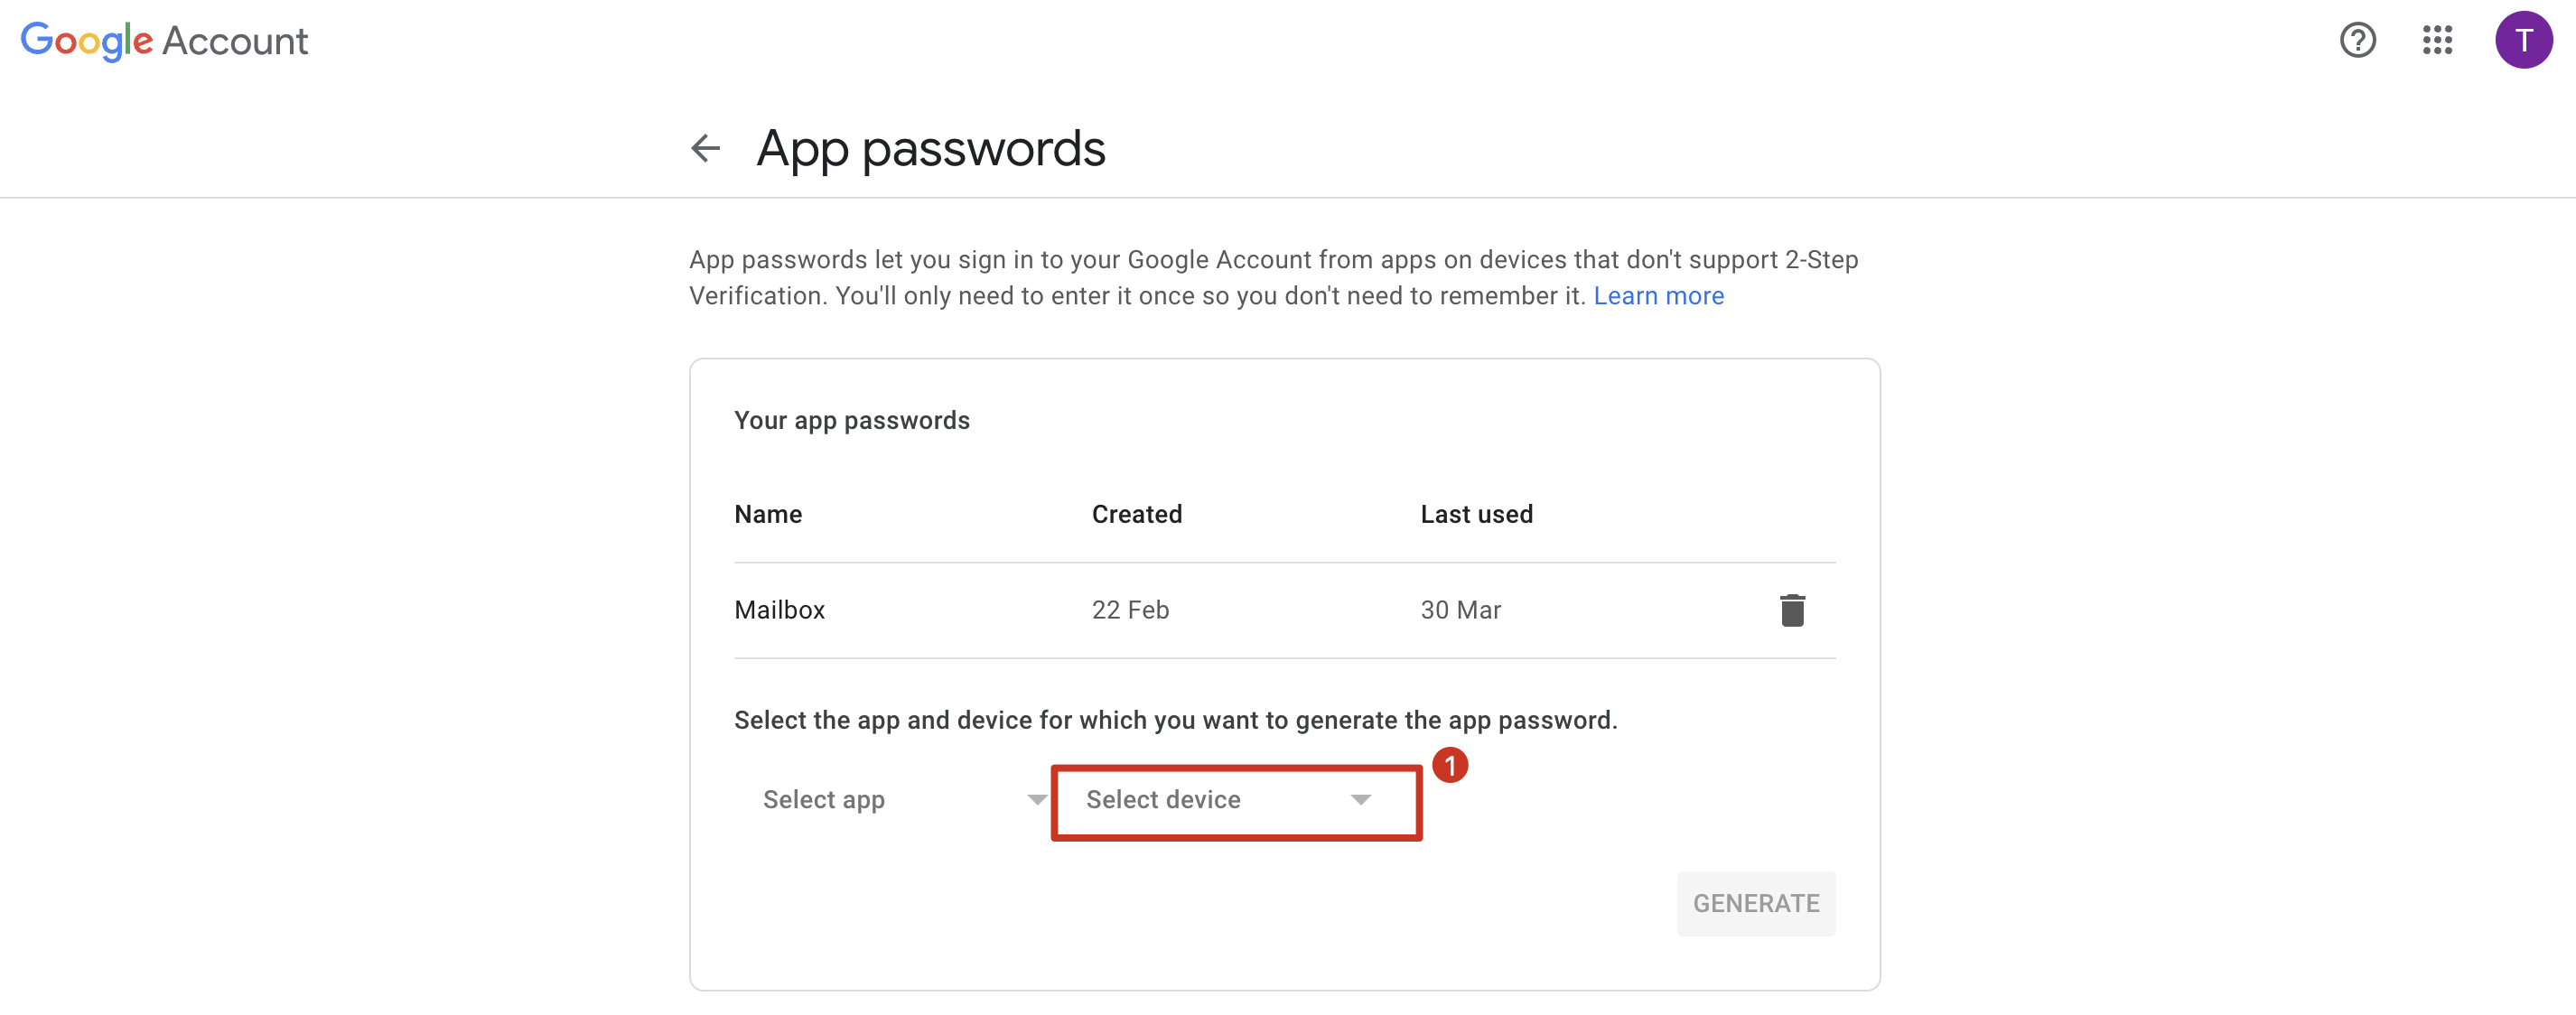
2)Select device and choose other, ennter the name you use for memory, such as FlashInfo.
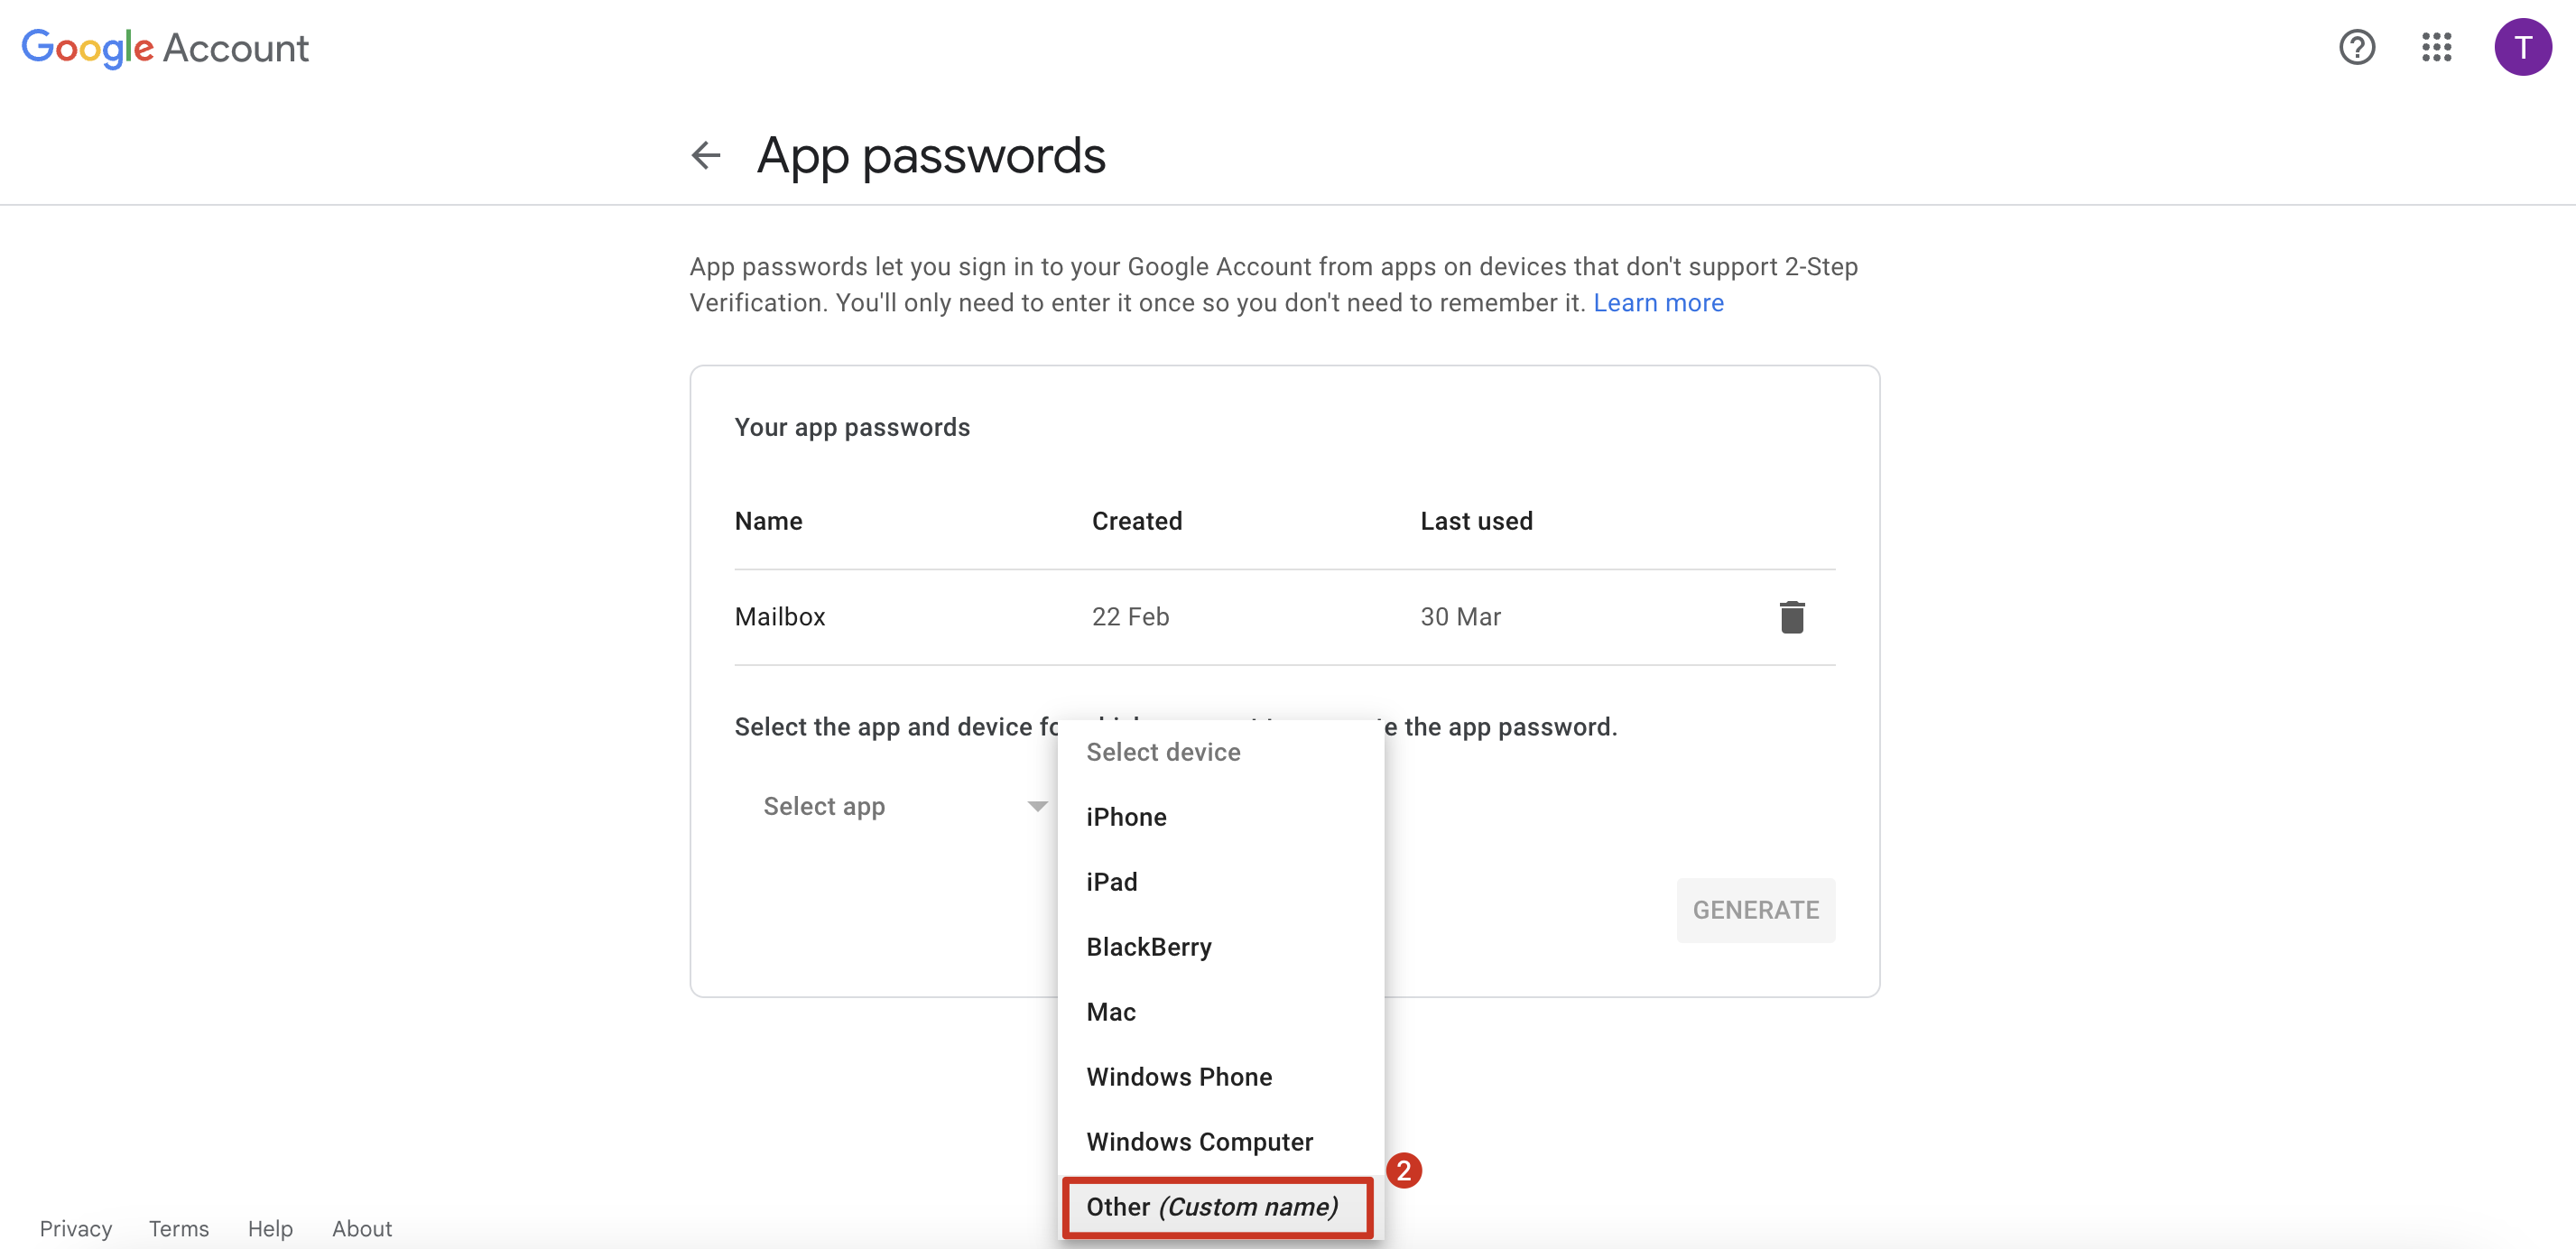
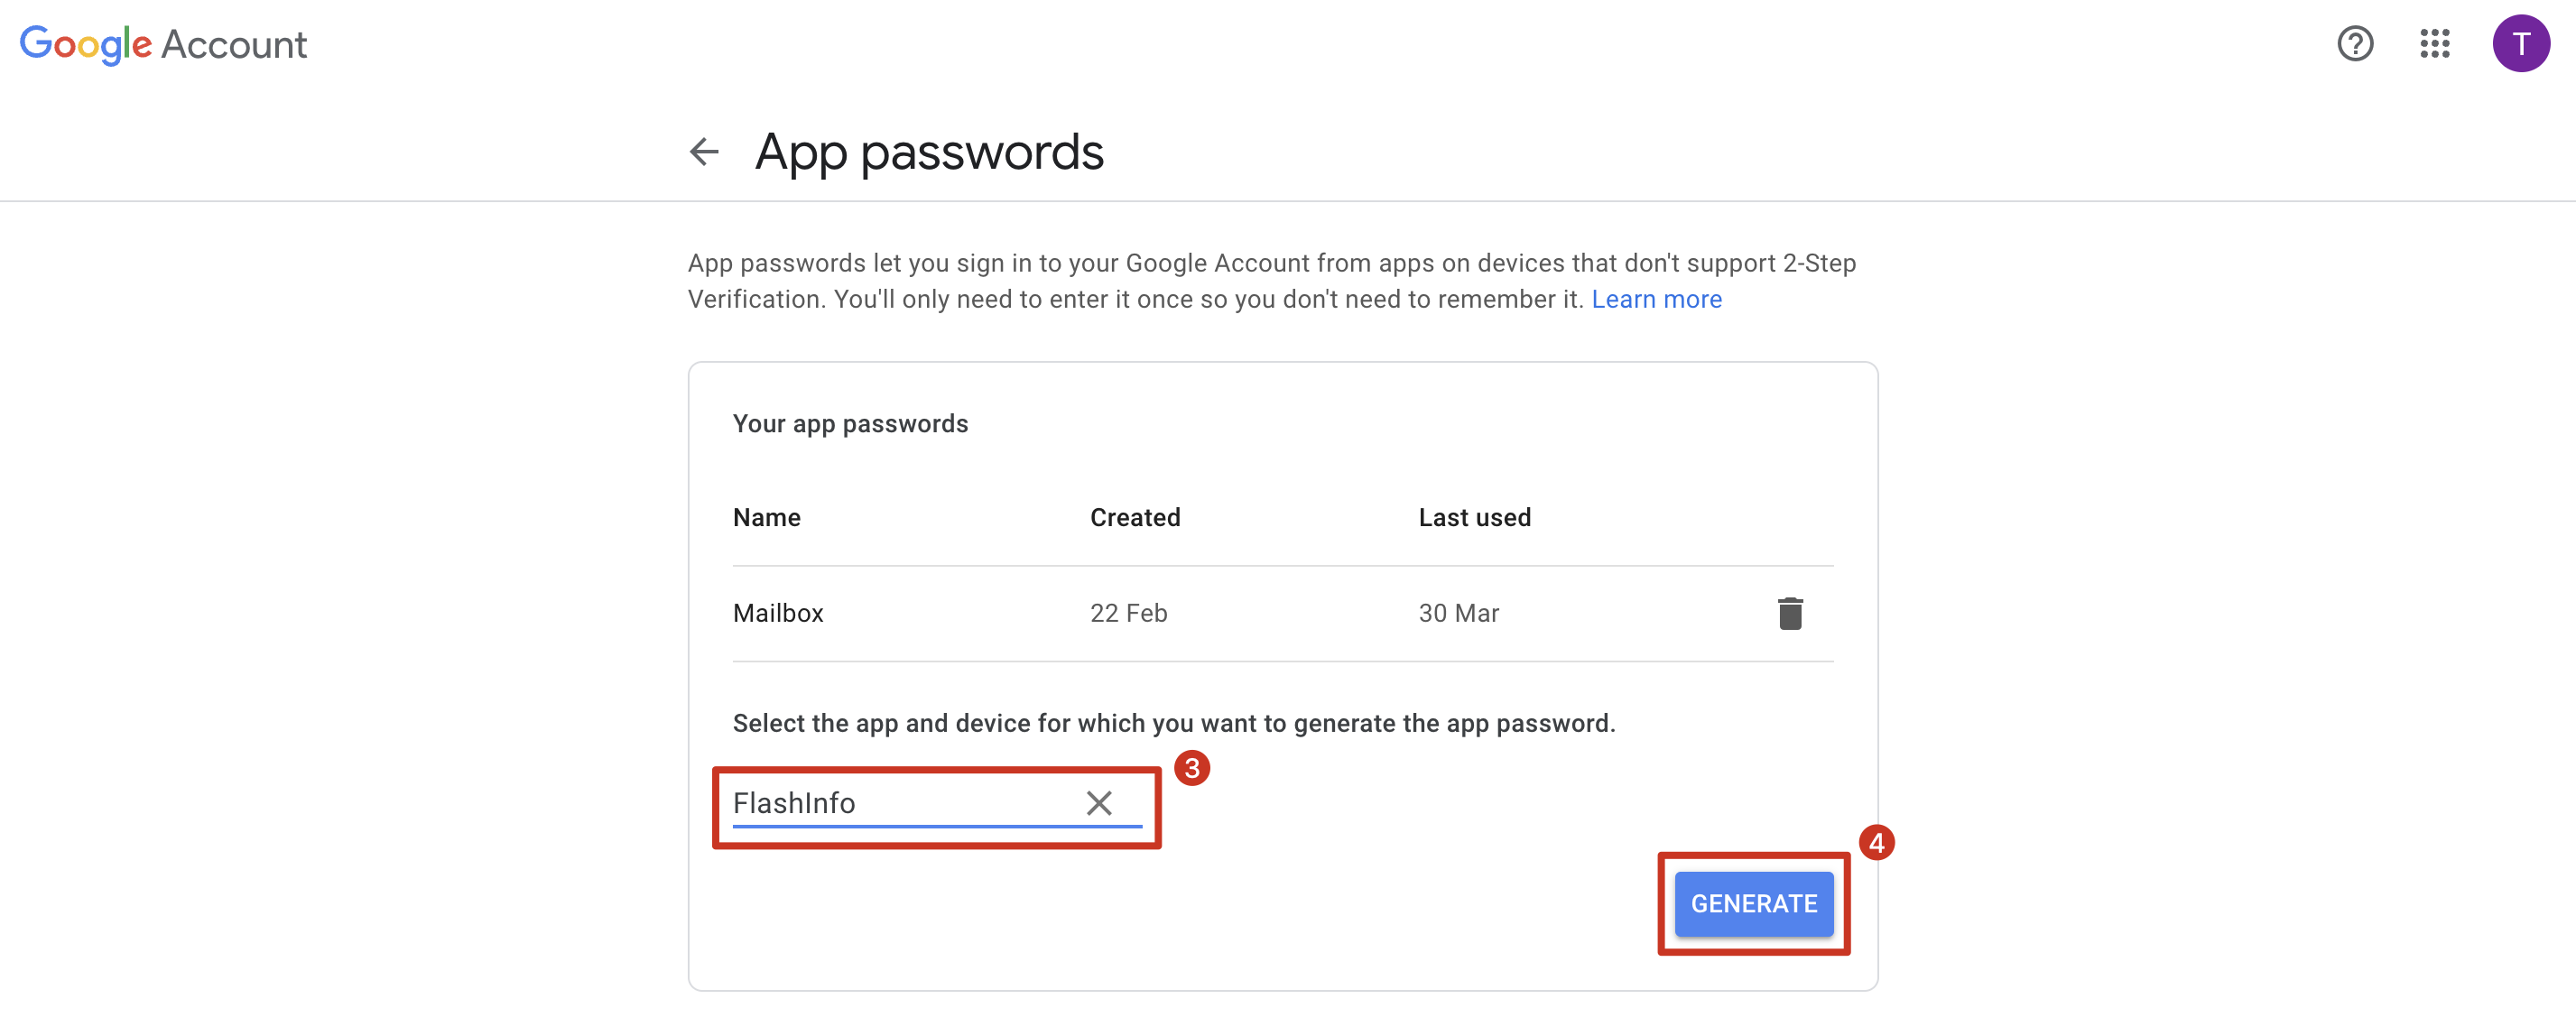
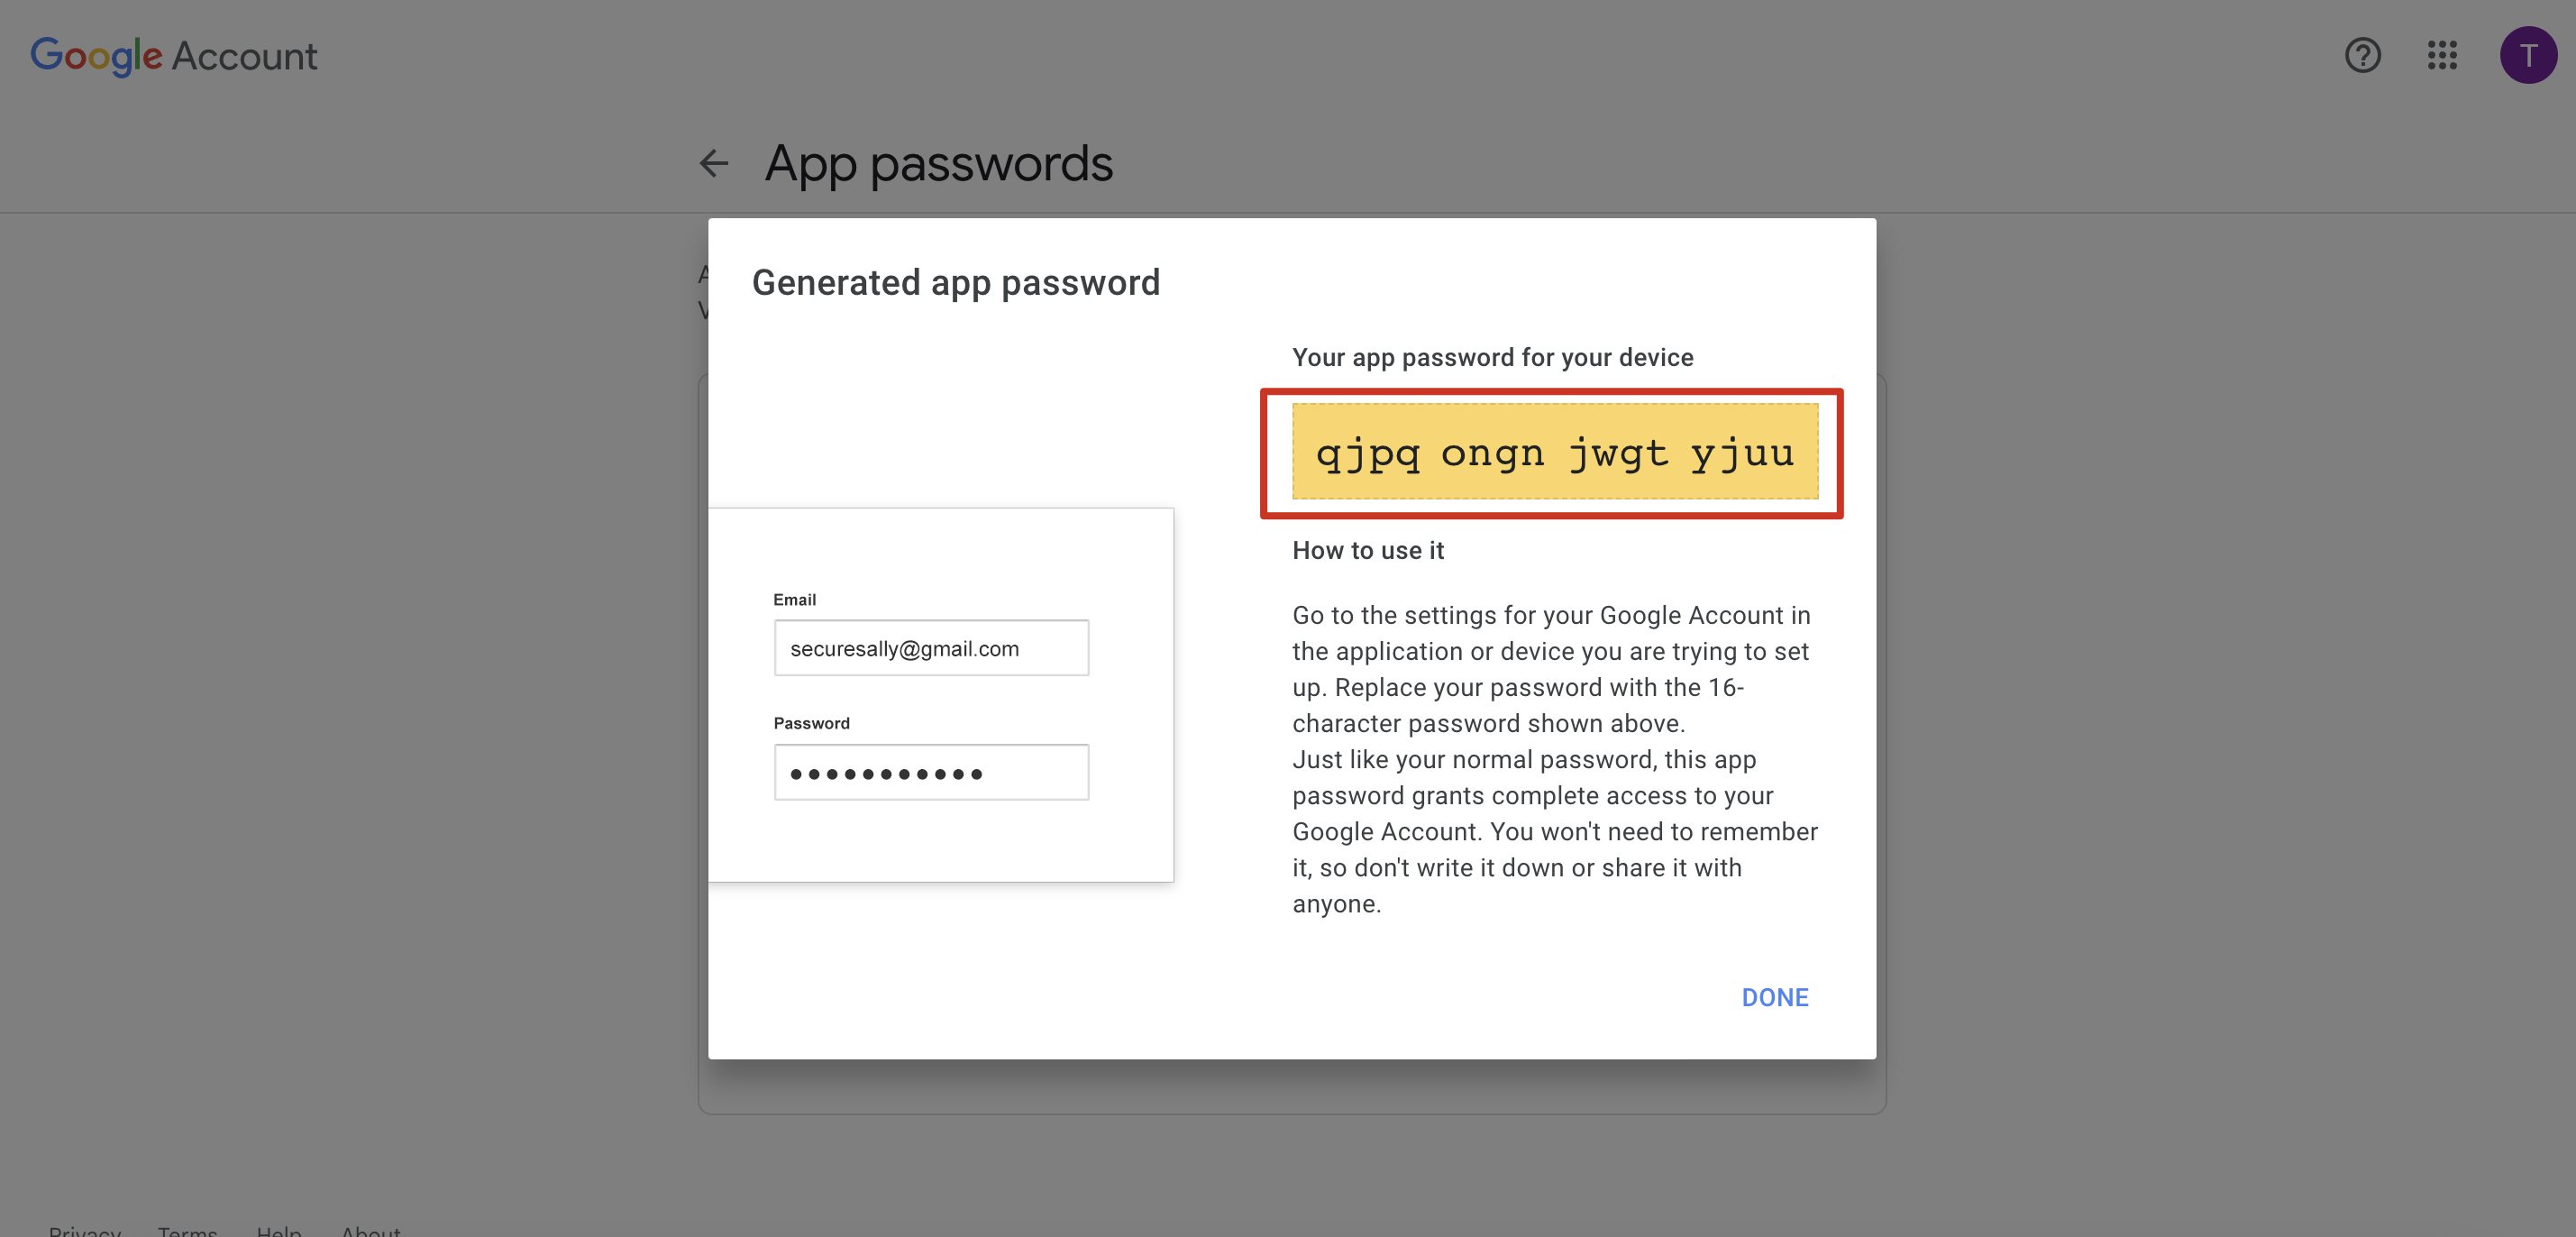
3)After generation, you will see the password. Remember to save it.
STEP 3
Now you need to enable IMAP access in your mailbox settings so that emails sent to your address are synchronized and simulate real activity in your mailbox
1)Login Gmail, click setting

2) Click Forwarding and POP/IMAP and Enable IMAP

STEP 4
Connect to FlashInfo with the password you generated
1)Login FlashInfo and Click Engage - Setting - Mailbox - Other Provider(or click here)

2)Enter your Email Address and previously generated App Password
