Set Up Meetings in FlashInfo
Leverage FlashInfo Meetings to remain in control of your schedule while empowering your prospects to proactively book time on your calendar.
Connect Your Calendar
Meetings is currently only compatible with Google Calendar and Microsoft Outlook.
To connect your calendar and enable meetings to be booked by prospects:
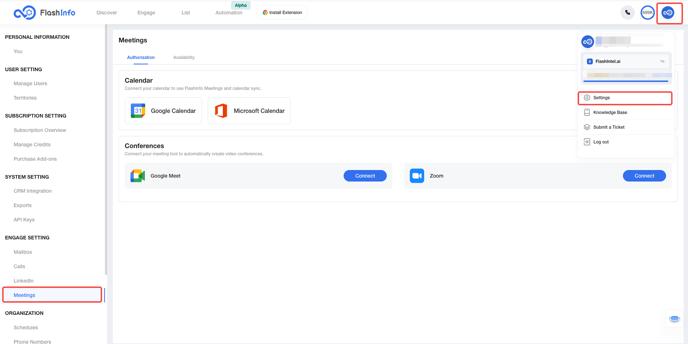
Launch FlashInfo, click Settings, and then click Meetings.
Select Calendar for connection.
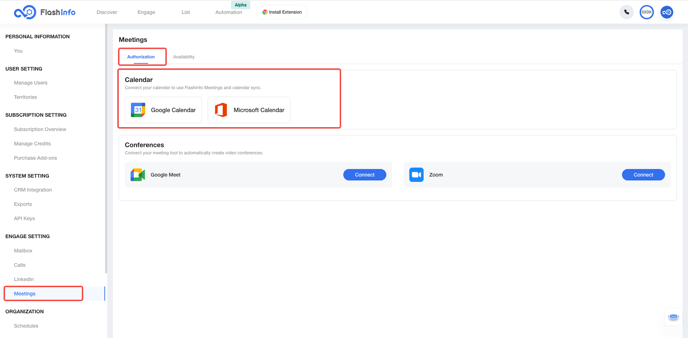
You can only connect one calendar per user, so choose your calendar wisely!
You have now connected your calendar.
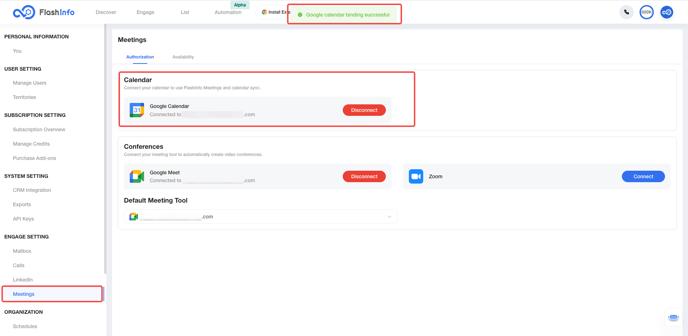
Set Your Meeting Conferences
With your calendar connected, you are ready to configure your default meeting settings.
If you connect Google Calendar, it will automatically connect to Google Meet.
FlashInfo supports Google Meet and Zoom natively.
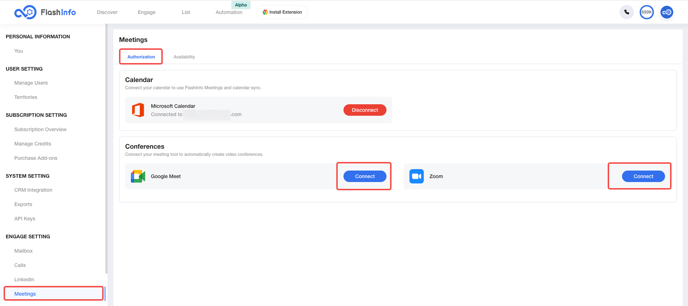
You have now successfully connected to the Meeting Conference.
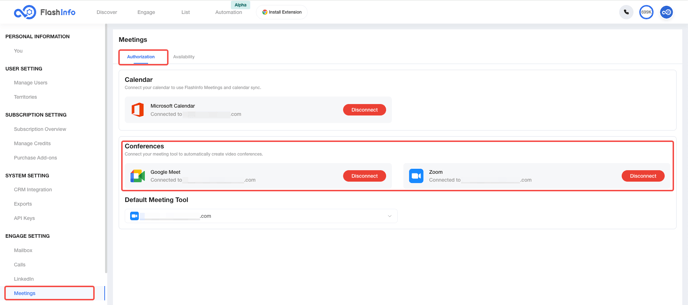
You can remove Zoom or Google Meet by using Conference Disconnect.

Set a Default Meeting Tool
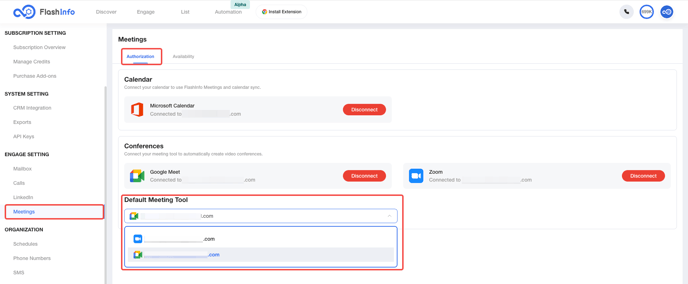
If you connected multiple video conferencing tools, you can choose which one to set as default. The default selection is used for your meeting tool every time you create a new meeting type.
To set the default meeting tool, simply select it to set it as the default.
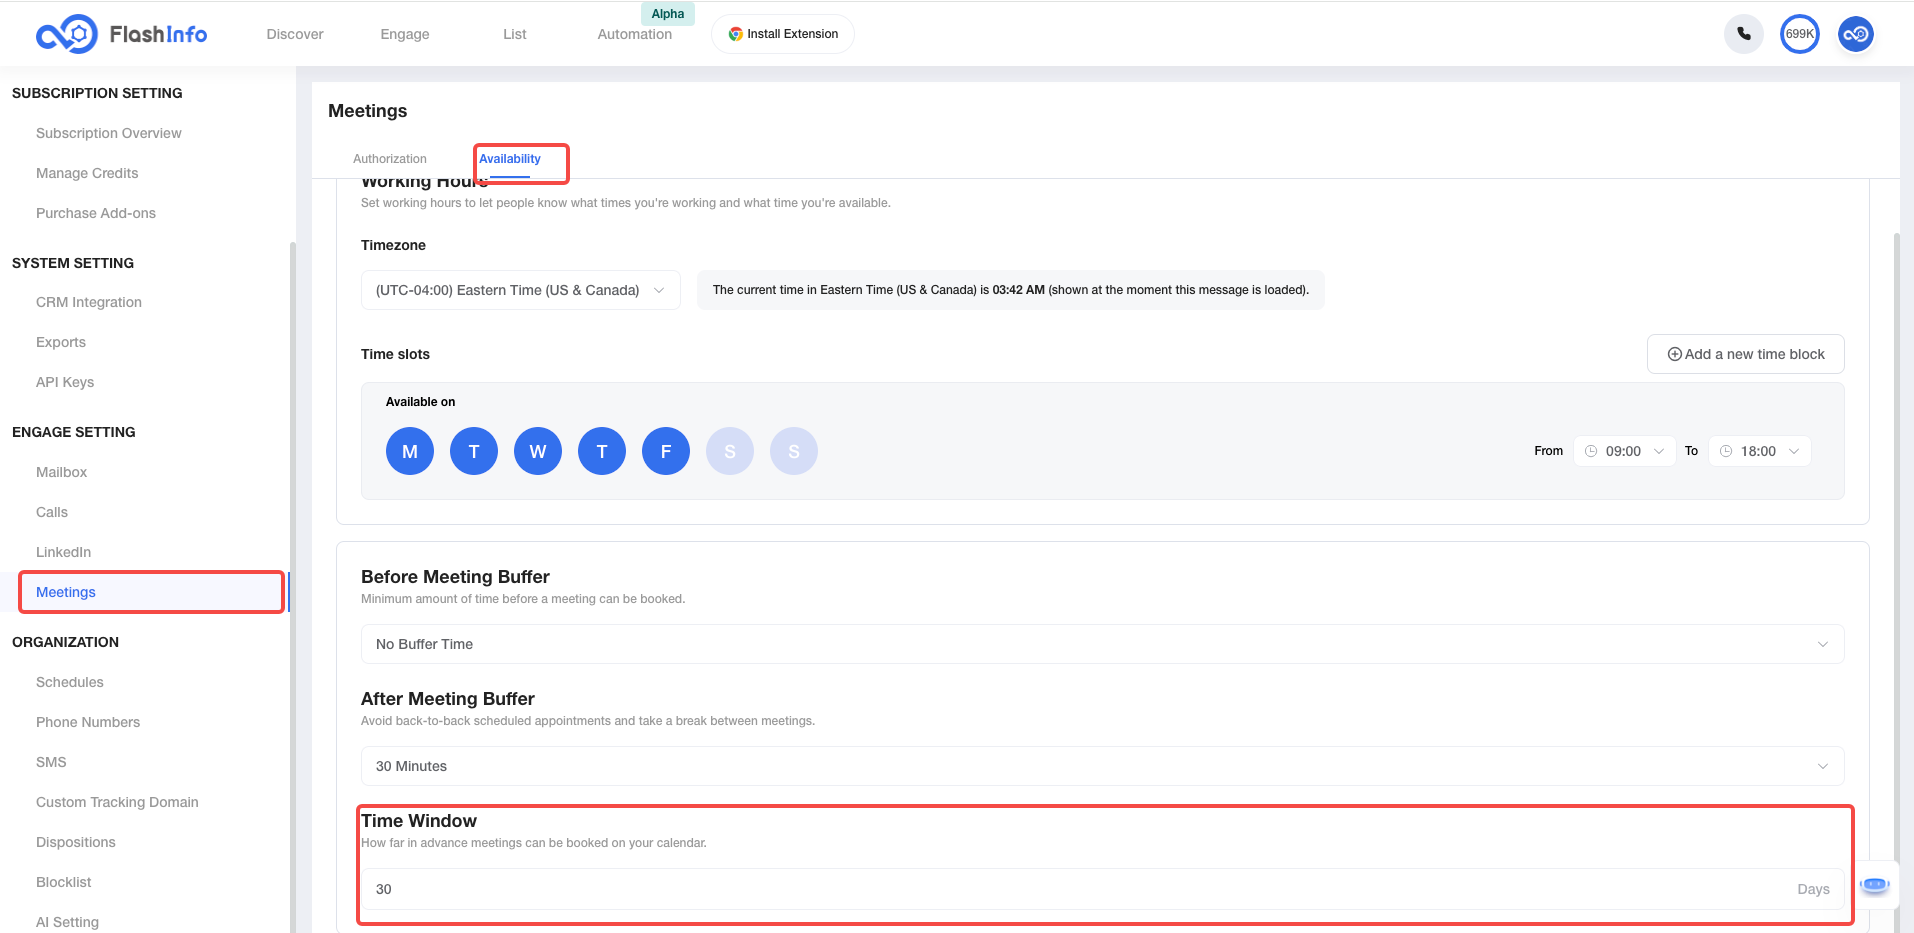
Set Your Meeting Availability
FlashInfo automatically adds your default timezone. If you want to change it, click the Current Timezone drop-down and select the timezone of your choice.

By default, FlashInfo sets your available times to Monday through Friday from 10 AM to 5 PM. To change your availability, select the blocks for the respective days on the left and the corresponding time slots.

To leave time between events, adjust the 'Before Meeting Buffer' and 'After Meeting Buffer' dropdown menus. Then, use the dropdown fields to select how much time you'd like to leave before and after each meeting.
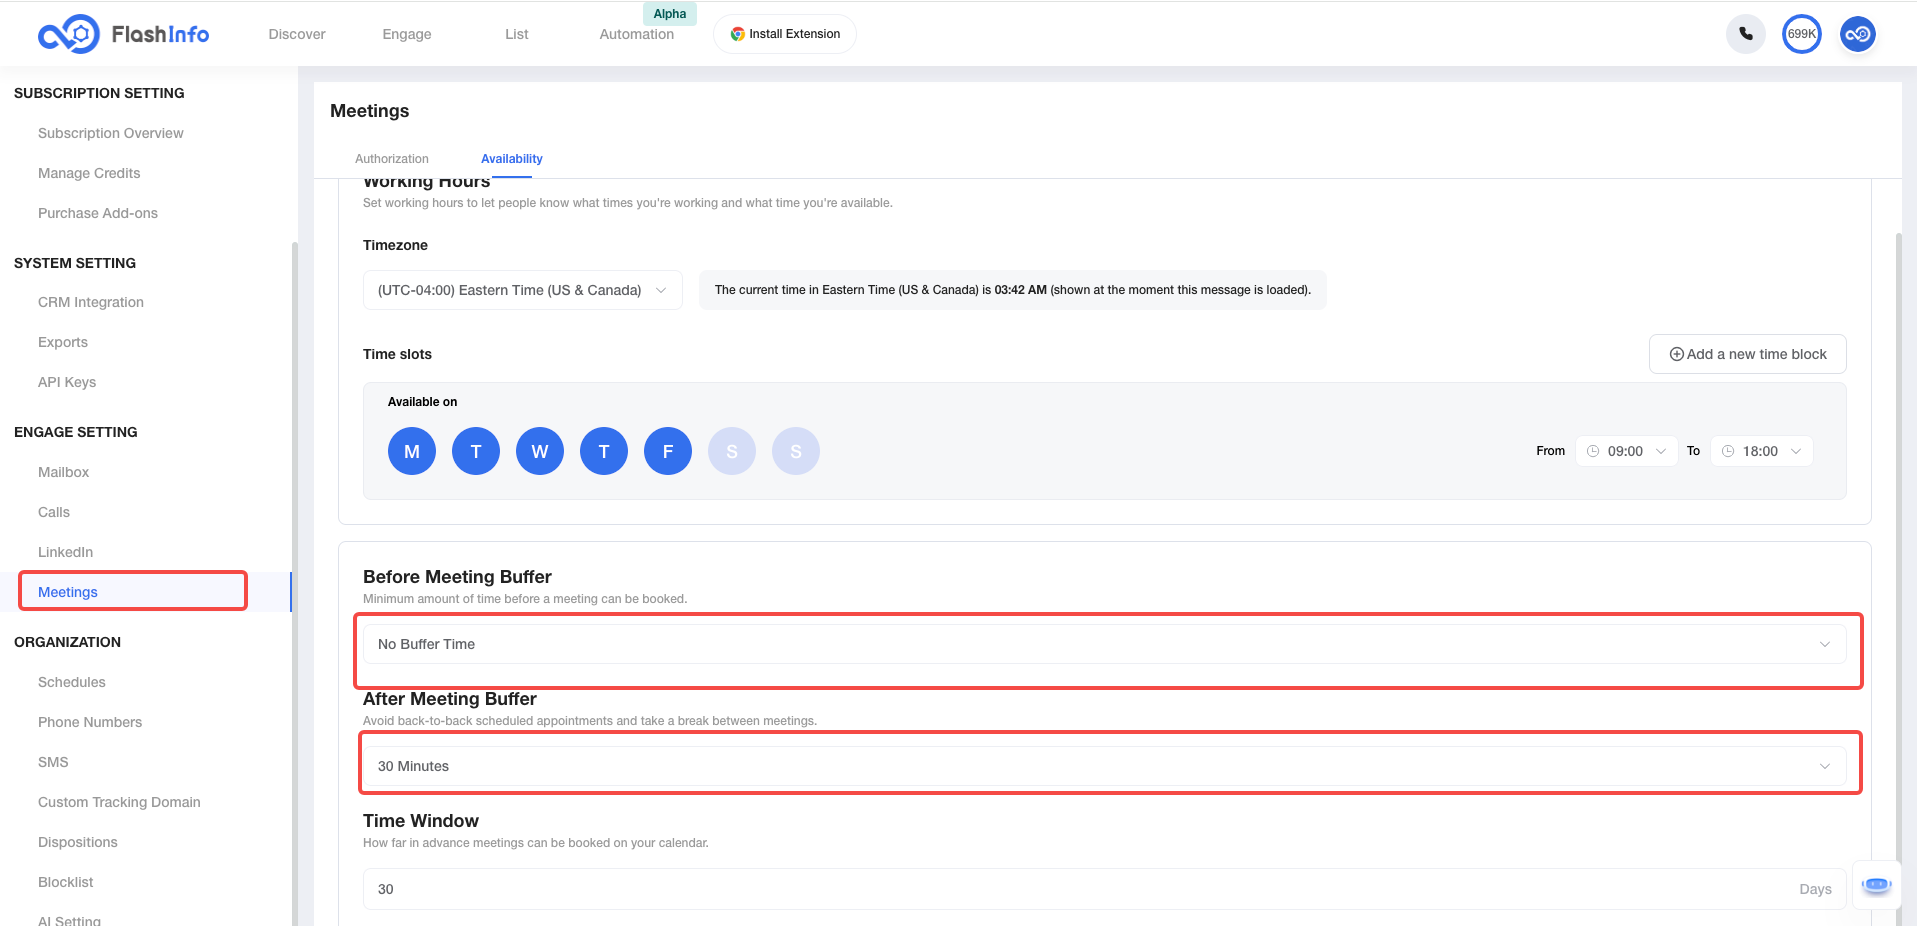
Set a time window to prevent prospects from scheduling last-minute meetings with you. Use this option to specify the minimum amount of time required between a prospect scheduling a meeting and the meeting taking place.
