FlashInfo New Weekly Update [8th April 2024 - 13th April 2024]
FlashInfo Discover
【FlashInfo PC】
-
Added multilingual display for various filters under the Discover tab's company search
-
Added multilingual search support for various filters in the Discover tab's company search
-
For the technology-intent filter, options can be translated into corresponding languages based on language settings, and search in different languages is supported

- For the multilingual return results of the company search under the Discover tab, the company name is not translated

-
For the csv enrichment under the List tab, resolved the issue of timeout failures due to large file uploads, improved response speed through asynchronous processing.
-
Added an "add to list" button in the contact module of the People Profile page

-
Fixed minor issues on the SEO people/company profile page
-
Changed the registration payment process on the SEO people/company profile page to default to showing the monthly package, with a discount for the first month.

-
Added return/cancellation policy to the official website
-
Added a link prompt for return/cancellation policy in all areas involving pricing and plan payments

-
Optimized SEM Google campaign
-
Optimized brand keywords related to dialer
-
-
Analyzed the data proportion of non-rich people/company profiles and established data cleansing rules
【FlashInfo APP】
-
Android supports scanning multiple business cards simultaneously


FlashInfo Engage
Features:
1. Support for meeting type management function.
New meeting feature that supports creating meeting links for different event types to send to contacts.
-
Add a meeting menu to the navigation.
When the mouse hovers over the Engage navigation, you can see the new meeting menu.

-
You can get the meeting link from the list of meeting types.
Once you have created the meeting link you need, you can obtain the corresponding link from the list of meeting types.
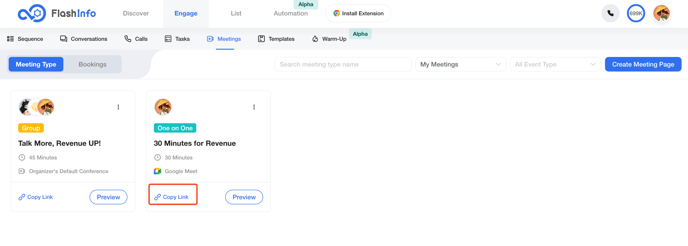
All available meetings in the meeting type list will be displayed, including those created by other colleagues. You can filter your list through filtering options.

2. Support for Google Calendar and Google Meet.
One necessary preparation for using the meeting function is to first connect your calendar.
-
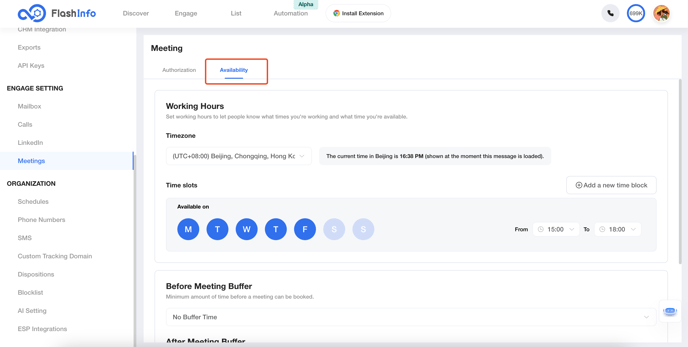
Connect calendar in meeting settings
Find the Meeting menu in Engage Setting to connect to the calendar.
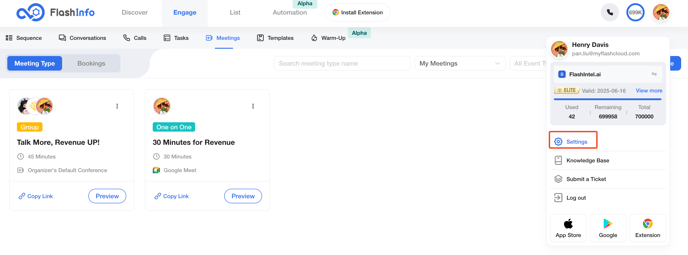
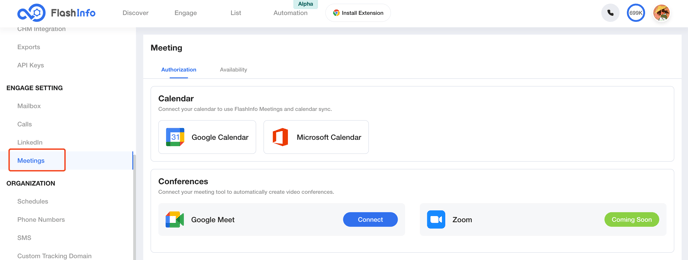
After connecting to Google Calendar, it will automatically link to Google Meet.
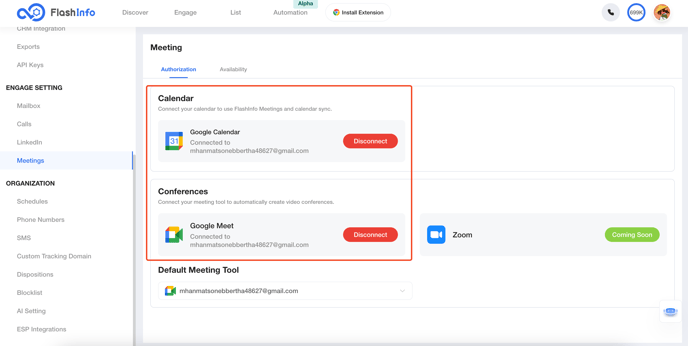
-
After connecting the calendar, you need to set your own meeting availability.
3. Support for creating meeting types functions.
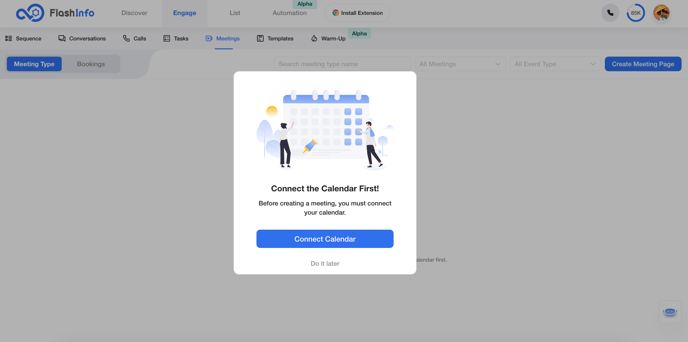
In the meeting type list, you can choose to create your own meeting. Before creating a meeting, remember to connect the calendar.

-
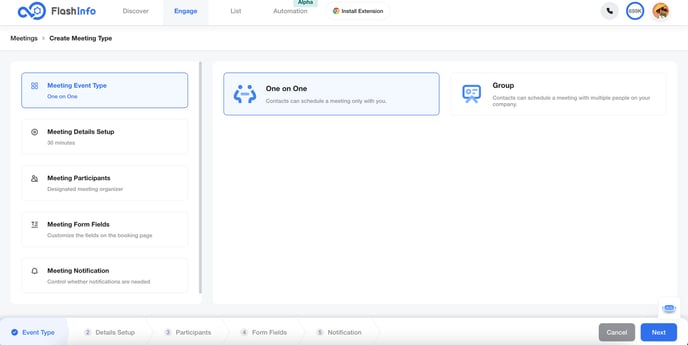
When creating a meeting, you need to first select the event type.
Currently, we support one-on-one and group sessions. We plan to add round-robin and prediction types in the near future.
-
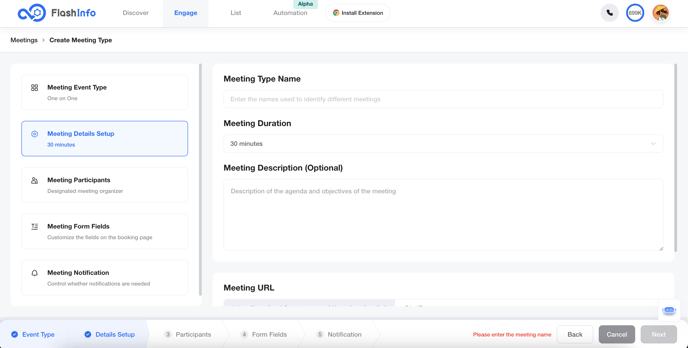
After selecting the type, you need to fill in the meeting information.
The meeting type name will appear on the schedule page, allowing you to identify different meetings and convey the meeting theme to the appointee.
-
After completing the meeting information, you need to select the participants.
If you choose the one-on-one type, then the participant will be automatically set to yourself.
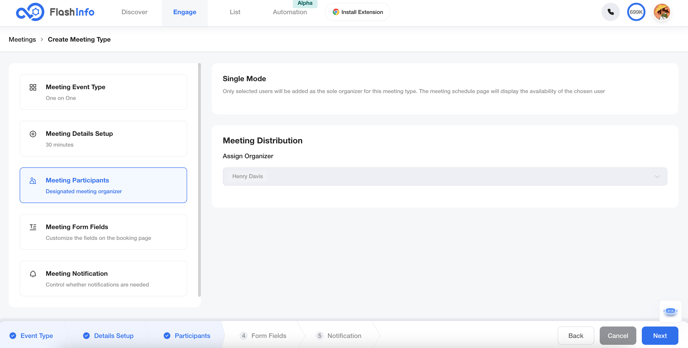
If you choose the group type, you need to select the meeting organizer and meeting participants. Colleagues who have not connected to a calendar cannot be selected.
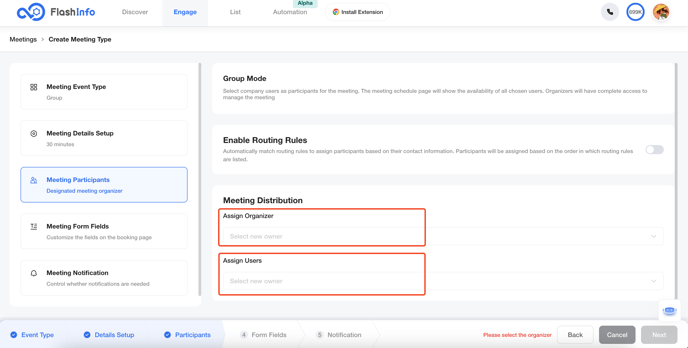
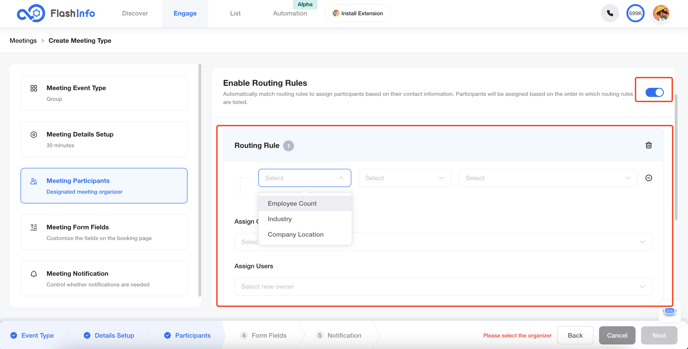
In the group type, you can also enable rule mode, and after enabling rule mode, you can set different meeting participants for different conditions.
After enabling the rule mode, guests need to fill in their information before they can select a date and time for the appointment.
-
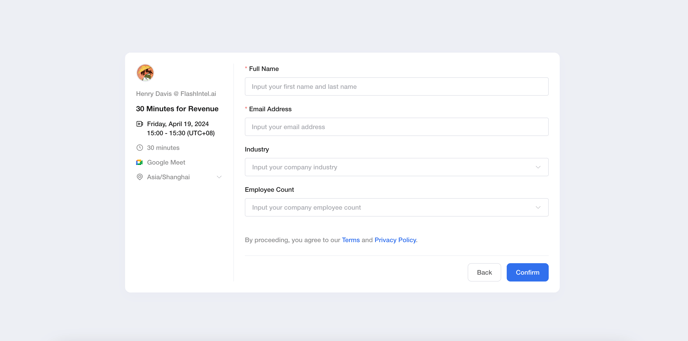
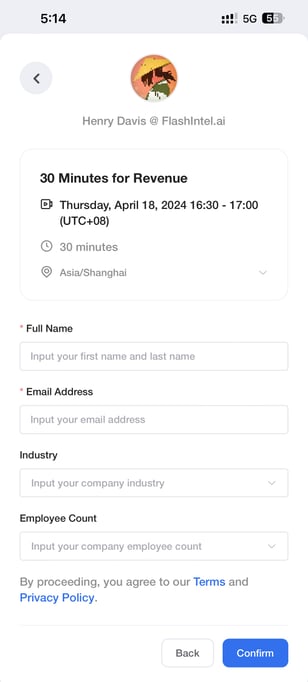
After selecting the attendees, you need to set up the information that guests need to fill in.
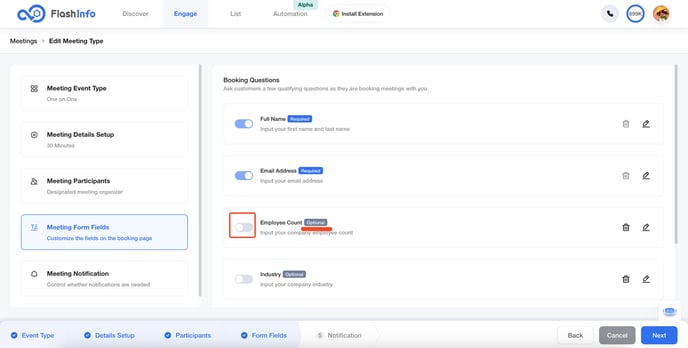
The full name and email address are required fields in the information provided, and additional fields can be added voluntarily.
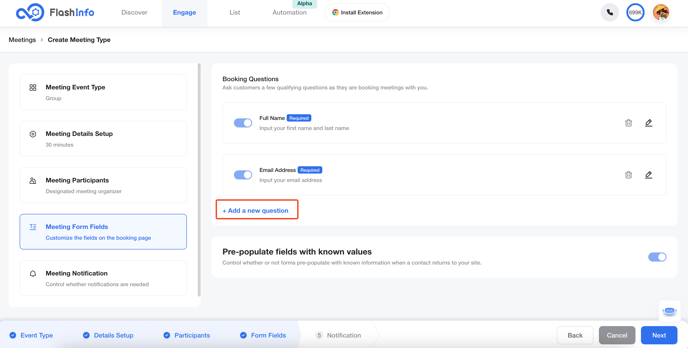
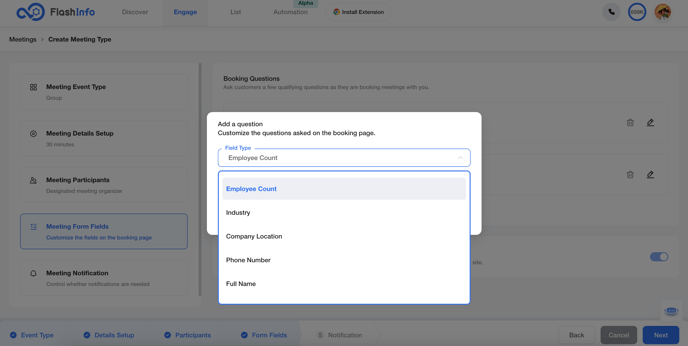
The additional fields added are optional by default. If you want guests to be required to fill them in, you can turn on the switch.
-
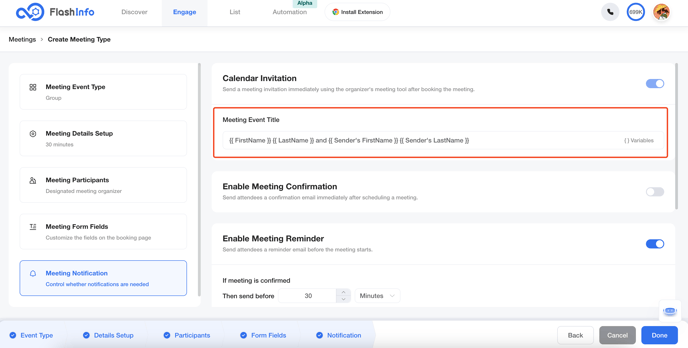
The last step is to control the meeting notification.
Opening the switch indicates that the corresponding notification will be sent, and it is also important to note that the meeting event title will be displayed on the calendar at the same time.

4. Support for online meeting booking.
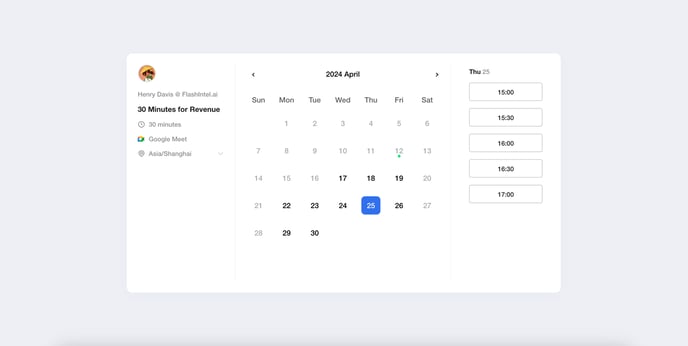
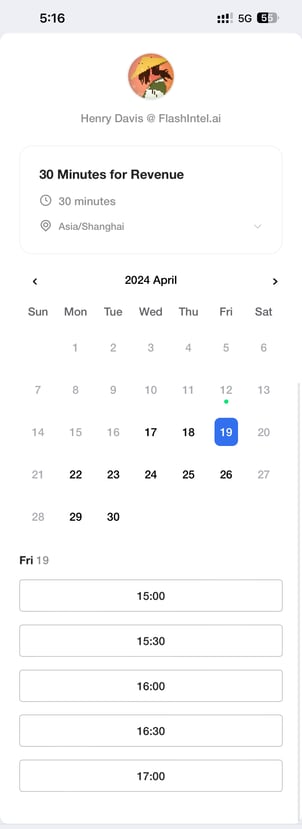
Every successfully created meeting type will be assigned a meeting link. This link can be opened to access the meeting schedule page.
-
Select the date and time of the meeting
-
Fill in the form information
-
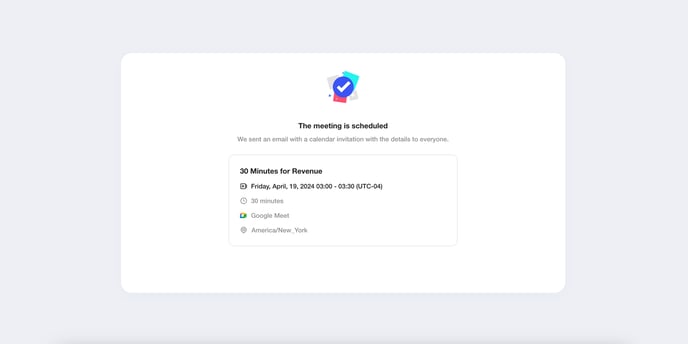
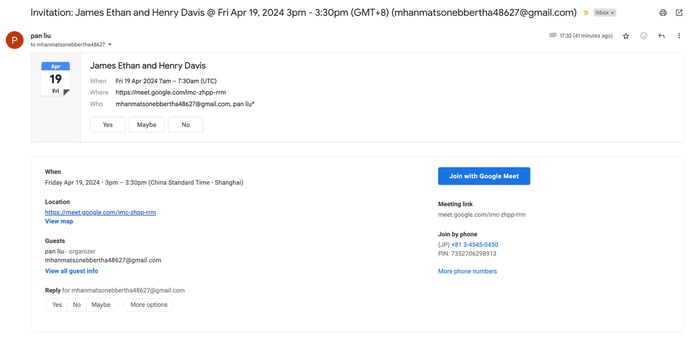
When the contact completes and confirms the schedule, the process will show as successful and a notification email will be sent.
5. Support for managing the list of booked meetings.
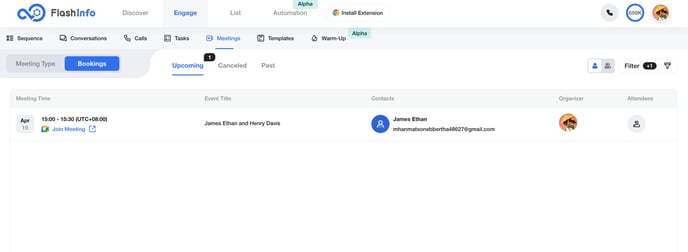
The booked meetings will be displayed in the Bookings list. Clicking "Join Meeting" will allow you to enter the corresponding video conference.
-
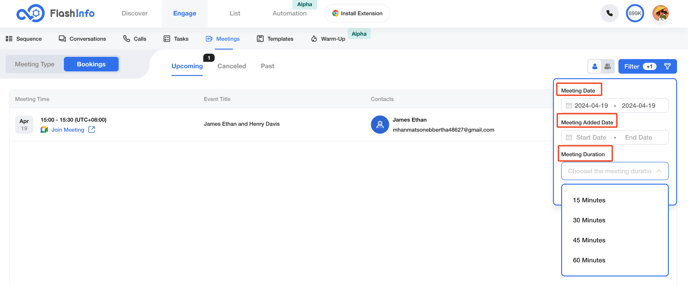
You can filter the data by meeting time, meeting added time, and meeting duration.
-
You can also quickly locate meetings through "Upcoming", "Past", etc.
