Overview
Zapier uses Zaps to connect apps and services together.
Every Zap includes a trigger step and at least one action step.
A trigger is an event that kick-starts a Zap.
An action is an event that a Zap carries out. When you turn a Zap on and a trigger event takes place, Zapier automatically completes the related action steps for you.
FlashInfo integrates with all Zapier-supported apps including Slack, Google Sheets, Typeform, Pipedrive, Zoho CRM, among others.
This means that you can connect with key web applications in your workflow and sync data between them.
Refer to the sections below to find out more about how to create Zaps for your FlashInfo account.
Create Zaps for your FlashInfo Account
Log into Zapier and click Create Zap on the left-hand side of the screen.
.png?width=688&height=188&name=i1%20(1).png)
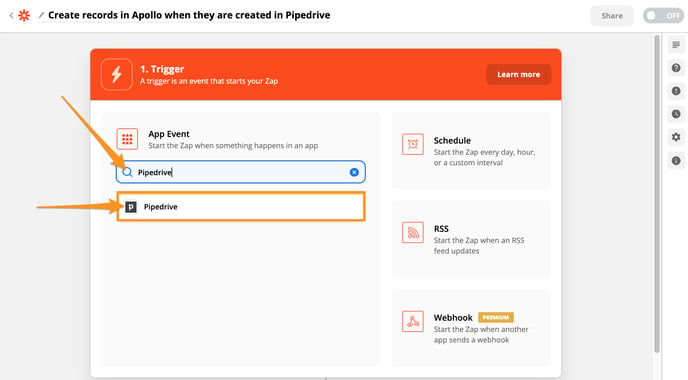
Type the app for the trigger into the Search bar. Then, click the app that appears in the drop-down.
- Use the Trigger Event drop-down to select the trigger that you want to use. Then, click Continue.
- And in last, If you have not connected your account to Zapier, click the Choose an account drop-down and then click + Connect a new account.
- Zapier will prompt you to log into the account. Add your credentials and click Log In.
- Once you have logged in, click Continue.
- To complete the setup and ensure the trigger works, you should run a test. To do so, click Test Trigger.
-
When Zapier informs you that the test is successful, click Continue.
Automated ZAP Template
FlashInfo also created many ZAP template for you.

Just click and use it.