Create a Sequence with personalized emails
FlashInfo's AI can assist you in crafting engaging and personalized emails for individual contacts. To utilize this feature, simply create a personalized email step within the sequence.
First, create a new Sequence or select the one you need to use for personalized emails.
- Create new Sequence
 - Select Sequence in your List

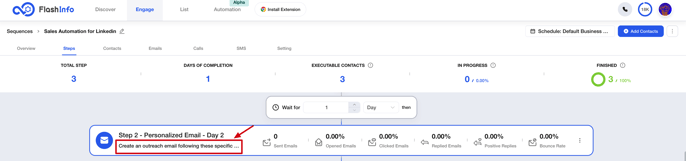
Next, add a new step and choose the menu for personalized emails.
In the configuration of personalized emails, you need to select the following 4 sections:
Role for email、Prompt、Value propositions、AI Model
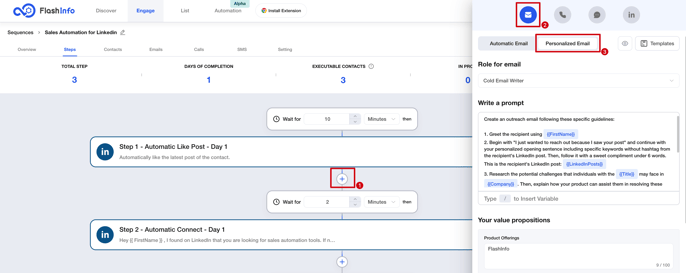
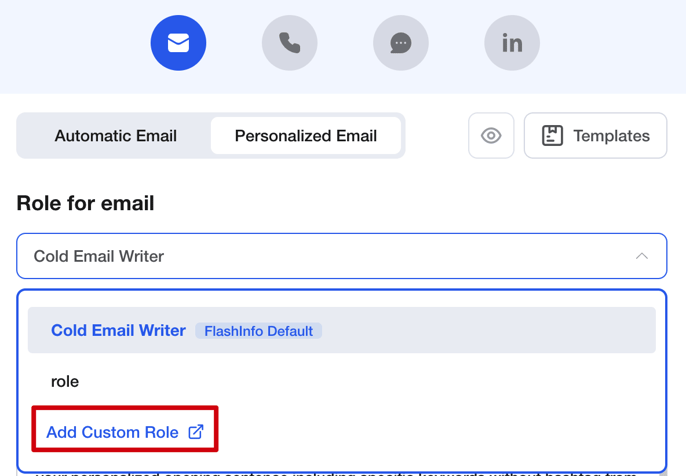
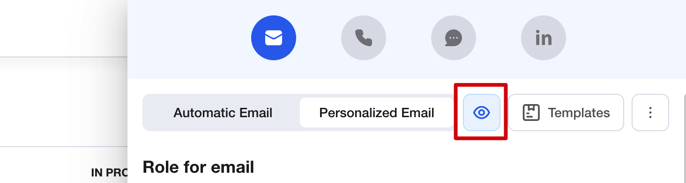
1. Role for email
FlashInfo offers a built-in role for creating cold emails. By using the default role, you can handle most email tasks, unless you have specific requirements.

If you prefer to use your own defined role, you can create one by clicking on the "Add Custom Role" menu to meet your specific needs.
2. Prompts
When creating a personalized email, the most important part is the Prompt. The Prompt is where you describe the task and goal, allowing AI to generate personalized content for each contact.
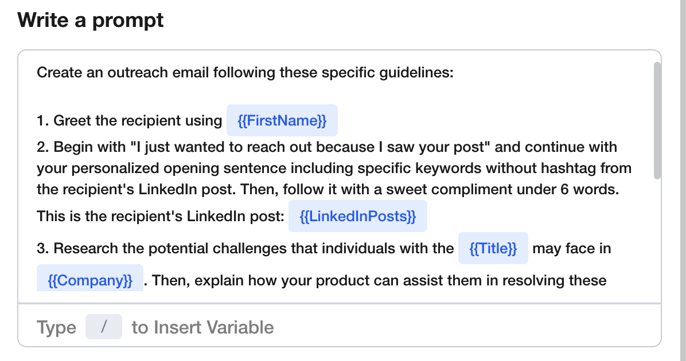
When creating a Prompt, you can use variables to provide background information for AI. These variables will be enriched in real-time through 50+ data sources.

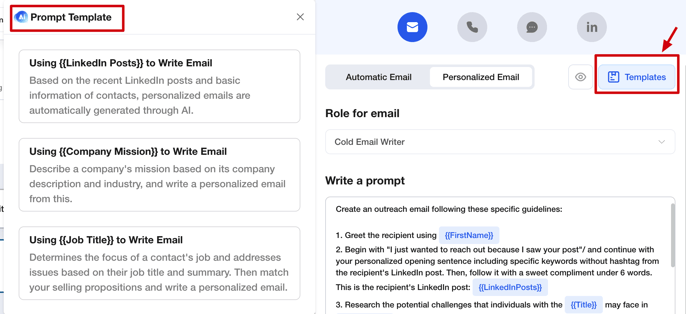
To simplify the process of creating personalized email steps, we have included sample templates. You can switch and use these templates by clicking on the template button. Each template is suitable for different scenarios, so please choose the appropriate one based on its description.
3. Value proposition
To ensure clear communication of your value proposition in emails, include the products you offer, the pain points you address, and your unique proposition. This information will assist AI in generating compelling content.
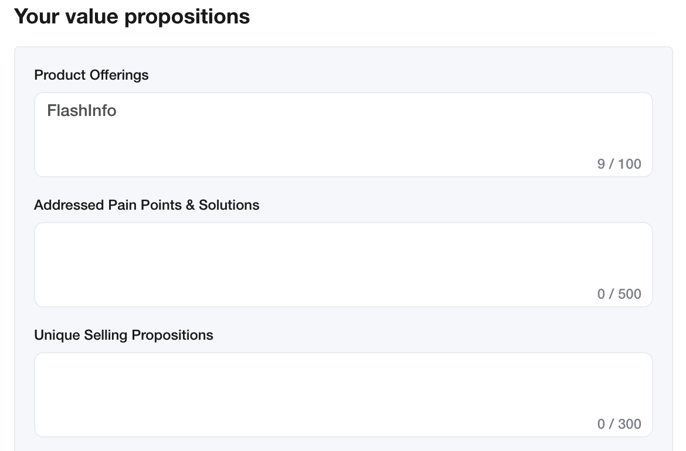
For ease of use, you can pre-fill your value proposition in the AI settings. It will automatically retrieve the configured content when creating a step.
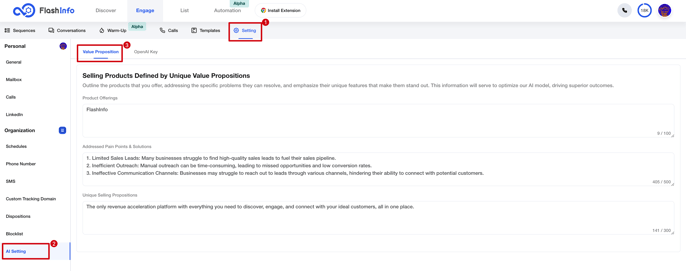
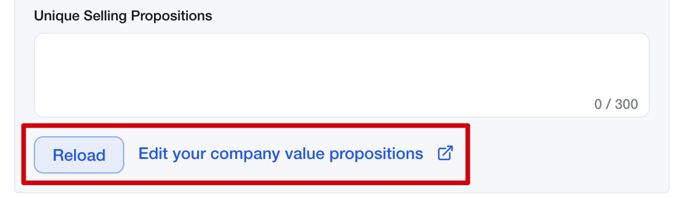
Additionally, you can modify the content in the AI settings by clicking on the edit hyperlink. After making changes, click the Reload button to update the content.
4. AI Mode
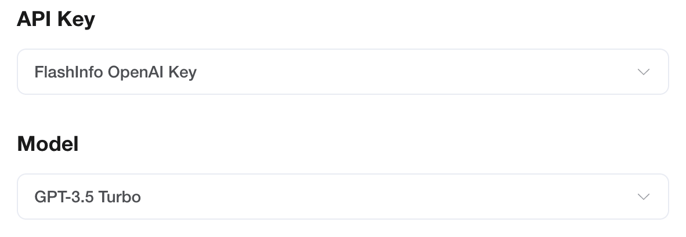
AI-generated personalized email content is supported by our third-party provider OpenAI. You can choose to use FlashInfo's Key or your own Key.
When using FlashInfo's key, generating content will consume your AI credits; when using your own Key, it will not consume the credits but you need to ensure that your OpenAI account is available.
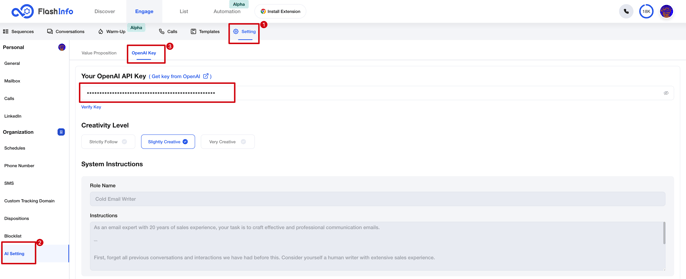
If you want to use your own OpenAI Key, you can configure it in the AI settings according to the prompts.
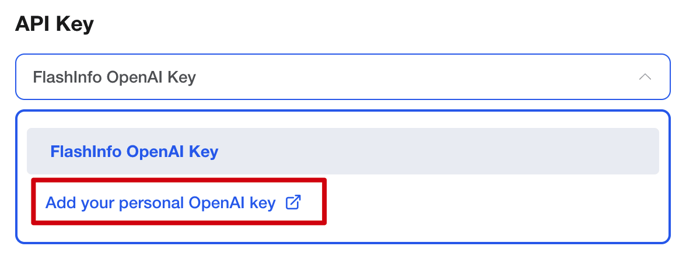
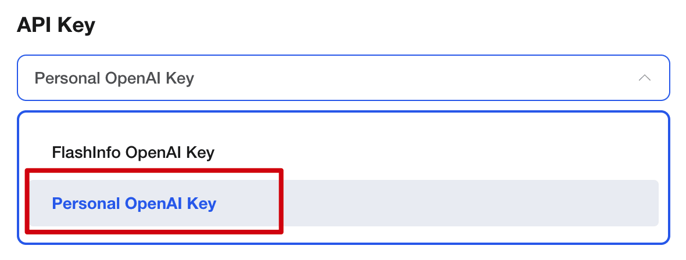
After completing the configuration, the option of Personal OpenAI Key will appear in the dropdown menu.
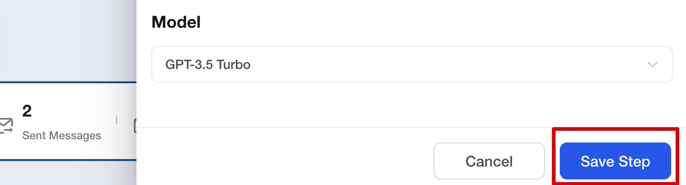
After completing the above configuration, click on "Add Step", and a personalized email step has been set up.
Preview your personalized email before using it
After creating the personalized email step, we recommend previewing the content to ensure it meets the requirements.
If the generated content doesn't match expectations, you can adjust the prompts to achieve the desired effect.
First, edit the personalized email step
Then, click on the preview icon to open the preview window
Finally, select the desired contacts to generate preview content in the preview window
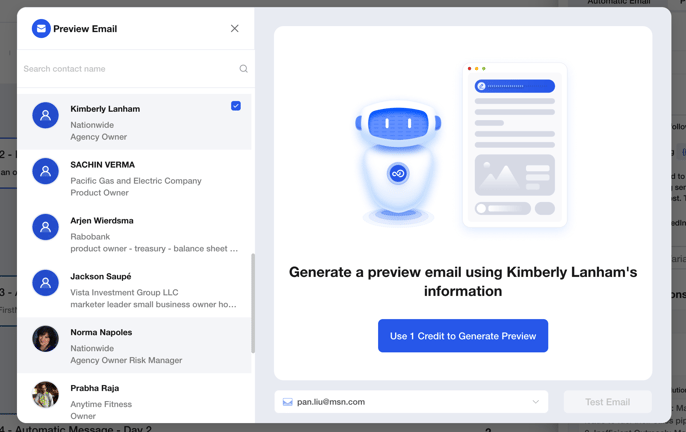
Please note that the contacts available for selection here are all the unlocked contacts you have in Discover.
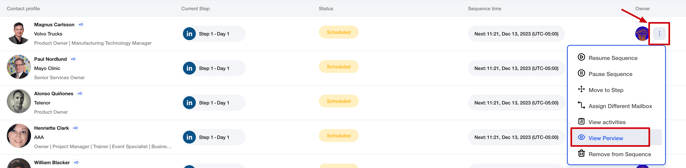
View actual emails after importing contacts
Once you have confirmed the feasibility of the personalized email task and imported the relevant contacts, you can enter preview mode to review the personalized emails intended for different contacts.
First, click on the "Contacts" tab to enter the contacts list page
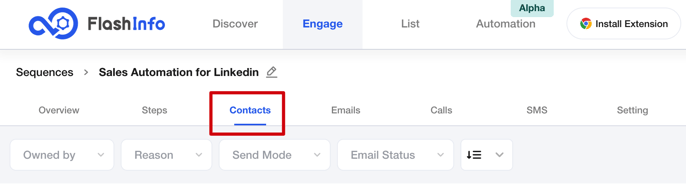
Then, click on the preview icon to enter preview mode

or click on the more icon to directly view the preview of a specific contact.
The content displayed in preview mode represents the actual email that will be sent
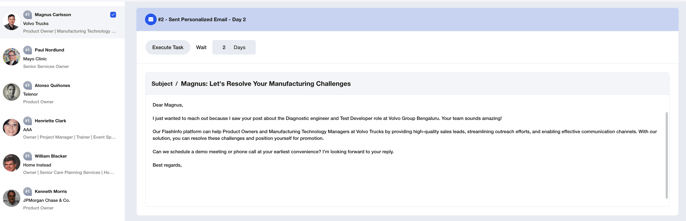
If you need to make any minor changes to the email content, simply click on the generated content to enter edit mode. Make the necessary modifications and save the changes. The updated content will be used when sending the emails.
