Where to find the number settings
- Login the FlashInfo, and Click Engage Setting
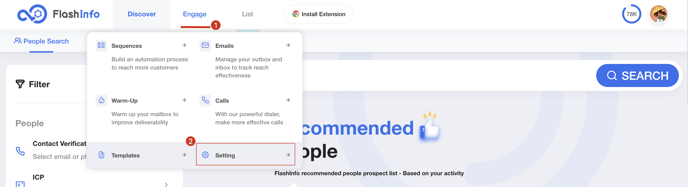
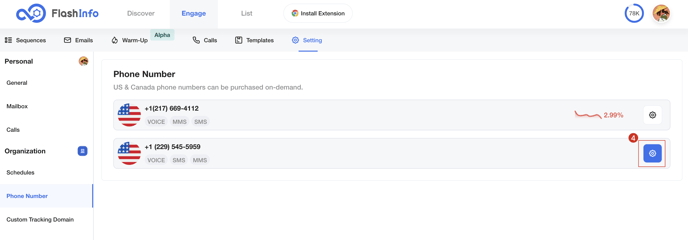
- Select the Phone Number tab
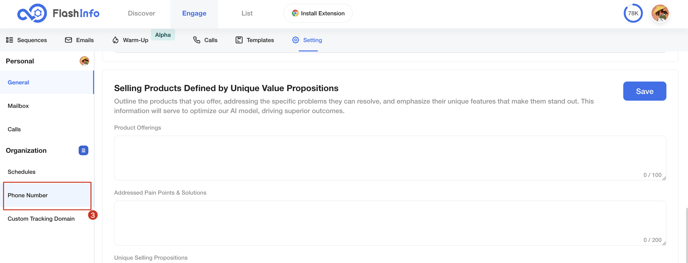
- Choose the Number you would like to set up
Configuring your FlashInfo Number Business Hours
Setting up your phone line's daily business hours enables automatic opening and closing of your phone lines.
FlashInfo administrators have the authority to set a number's opening hours regardless of the user's working hours.
- Choose the Number you would like to set up
- Select Inbound tab
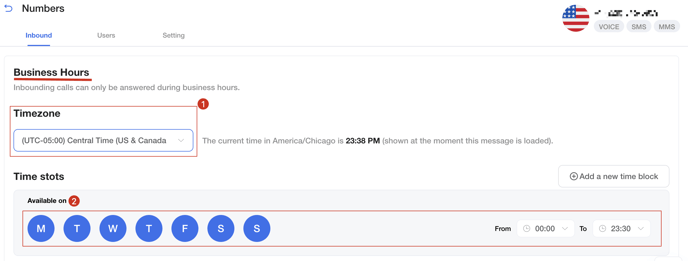
You can select the Timezone, and specific Time Slots that include the day and hours your lines will be open and closed.
After setting the business hours, any changes will be automatically saved.
Customize Messages and Voicemail
Configuring these messages allows you to communicate with customers when the online route is closed or the agent is busy, creating a friendly experience for your customers.
- Choose the Number you would like to set up
- Select Inbound tab
Online setting
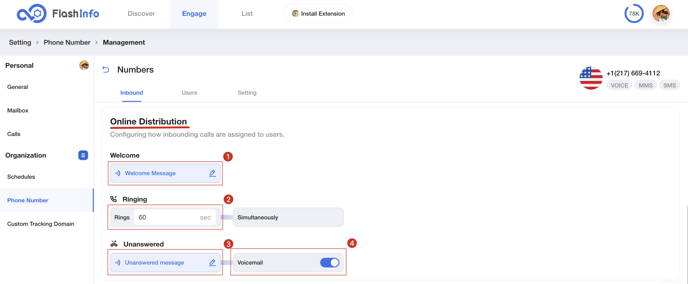
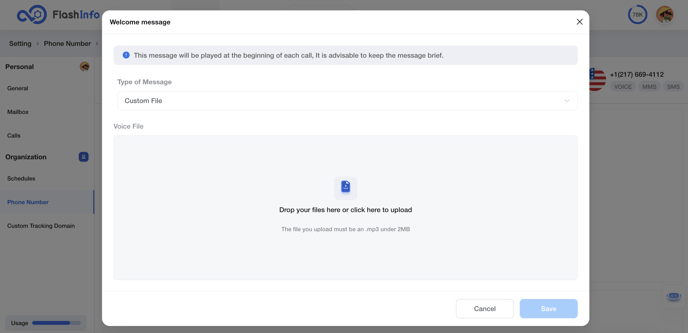
Welcome Music
This is the message that will play at the beginning of each call. Callers will hear this message before hearing the Waiting music. The caller must listen to the entire Welcome message before the call can proceed. It is best to keep this message short.
- Click edit icon
- Choose the type of voice, you can choose either Text to Speech or Custom File.
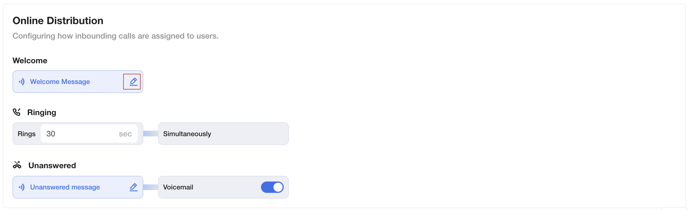

Ringing Time
After the customer's call is assigned, all agents will ring simultaneously. The administrator can set a maximum ringing time.
If there is no agent response within the set time limit, the customer will hear an automated unanswered message indicating that no agents are available.
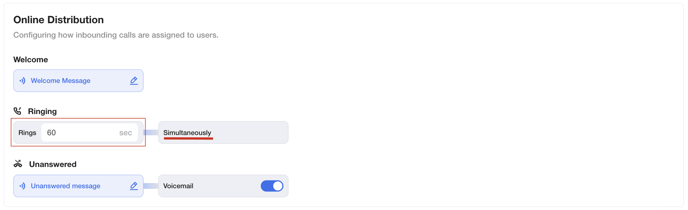 Tips: The setting range for ring time is 30s to 600s.
Unanswered Message
The caller will hear this message if their call is not answered when business hours are open.
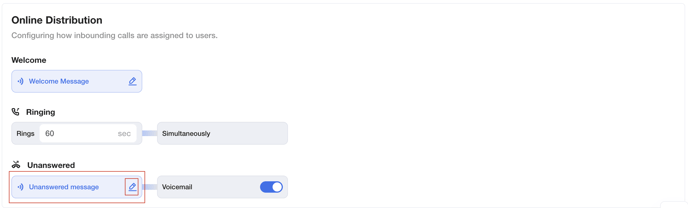
This message is also related to the setting that determines whether customers can leave voicemail. When the switch is turned on, customers can leave voicemail after the broadcast ends. On the other hand, when the switch is turned off, the call will automatically disconnect after the broadcast ends.

Offline setting
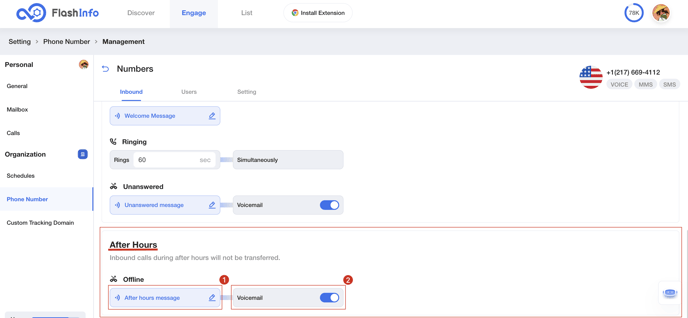
After Hours Message
The After Hours Message is the message that your customers hear when they have called outside of your set business hours.
 This message is also related to the setting that determines whether customers can leave voicemail. When the switch is turned on, customers can leave voicemail after the broadcast ends. On the other hand, when the switch is turned off, the call will automatically disconnect after the broadcast ends.
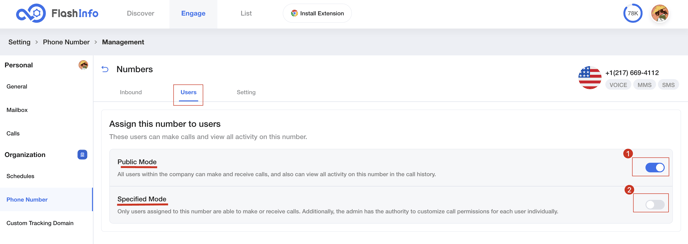
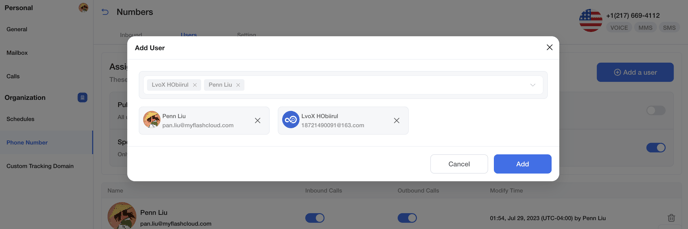
Assign users to phone numbers.
The number is set to Public Mode by default. In this mode all users within the company can make and receive calls, and also can view all activity on this number in the call history.
Administrators can switch to a specified mode, In this mode only users assigned to this number are able to make or receive calls.
- Choose the Number you would like to set up
- Select Users tab
- Choose the mode you want to use
 If you choose to open the specified mode, there will be a button to add users.
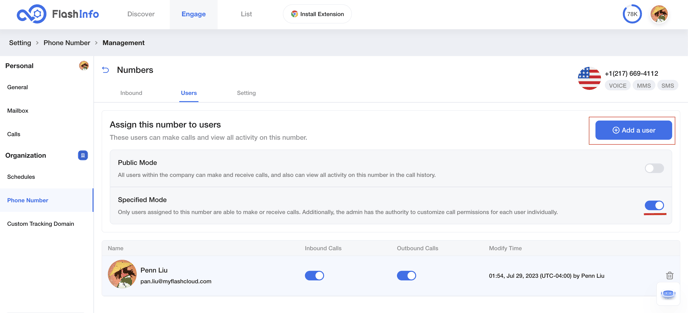
Administrators can control the ability of added users to make and receive phone calls.
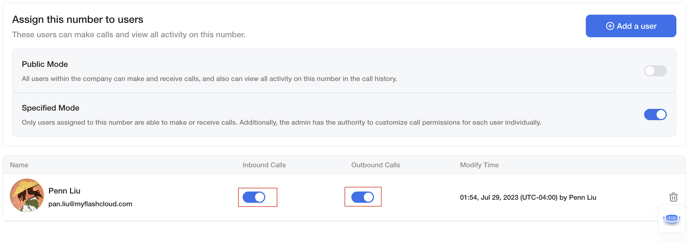 If the Inbound calls switch is turned on, this user can answer inbound calls; otherwise, this user cannot answer inbound calls.
If the Outbound calls switch is turned on, this user can make phone calls; otherwise, this user can not make phone calls.
Set the name and priority of the number.
Setting a name can help quickly identify the target number when selecting a number.
When Prioritized Dispatch is turned on, Inbounding calls received on this line will be prioritized for dispatch to available agents compared to calls coming from a regular line.
.png?width=688&height=244&name=image%20(18).png)
Recording control of the number
.png?width=688&height=333&name=image%20(19).png) Call recording can be separately controlled for outbound and inbound calls. And they're all on by default.
Call recording can be separately controlled for outbound and inbound calls. And they're all on by default.
.png?width=688&height=164&name=image%20(20).png) In addition, administrators can control whether users who have this number are allowed to use their own recording configurations.
In addition, administrators can control whether users who have this number are allowed to use their own recording configurations.
If the switch is turned on, when the user dials or answers a call using this number, their own configuration will be used and the configuration here will be ignored.