When contacting people, selecting the right person is crucial. If you have a workflow, you can set up a webhook to send suitable contacts to the Engage system instantly.
Firstly, create a webhook.
Please log in to the FlashInfo system first, then choose the Sequence you need from the list.
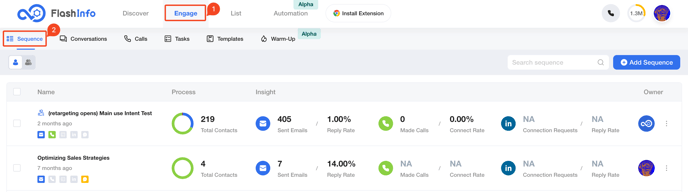
Click on "Add Contact" and choose "Sync from Webhook". Create a Webhook on the Webhook management page.

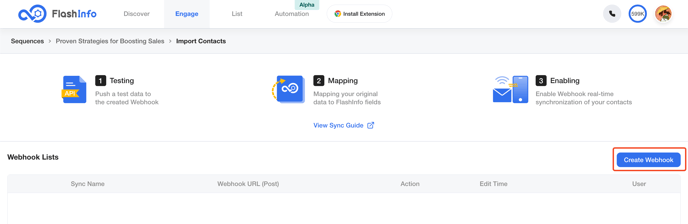
After creating your webhook successfully, you will be able to view the webhook URL and key needed for data pushing.


Note that each webhook is linked to a single Sequence, and different Sequences need separate webhooks.
Secondly, integrate the Webhook into your workflow.
You should configure based on each system's requirements. This article focuses on configuring in HubSpot and Salesforce. For other systems, follow their usage instructions.
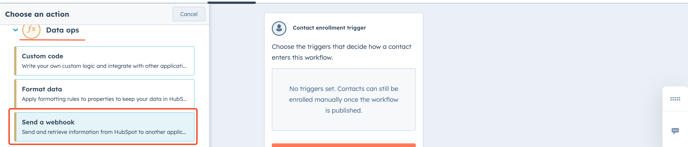
Setting up in HubSpot
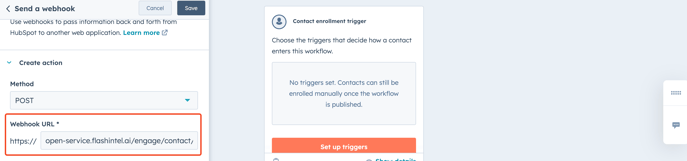
Open the Workflow you need to use and add the "Send a webhook" action. Configure your webhook with the URL and key provided by FlashInfo.
- Select the method "Post"
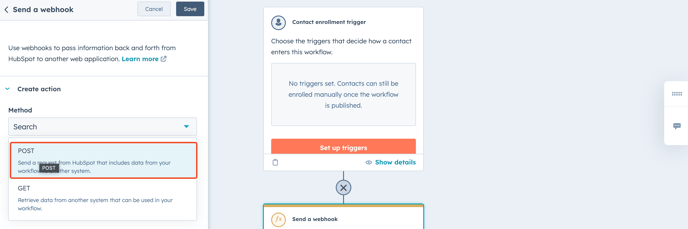
- Copy the Webhook URL directly
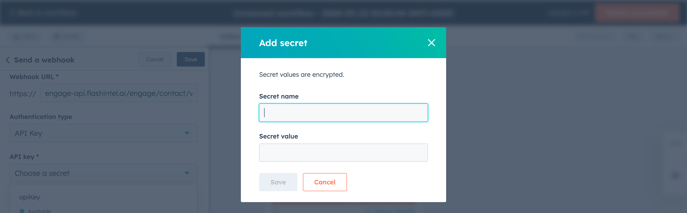
- Create an API Key, with the Secret name using the Key name and the Secret value using the Key value.
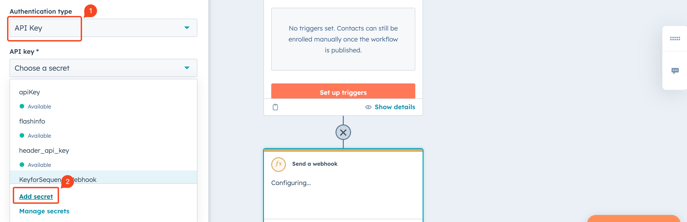
- After choosing the API key, API key name will be filled in automatically. Make sure the API key name matches the required key name for FlashInfo.

- API key location Keep the default selection and use "Request Header"

Other configurations can be set according to your own requirements.
Setting up in Salesforce
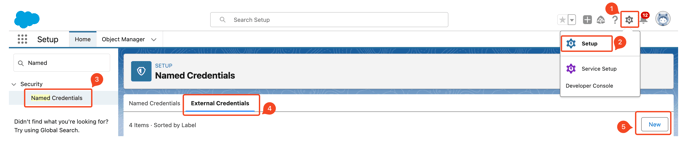
In Salesforce, you need to create credentials for HTTP Callout before using a webhook.
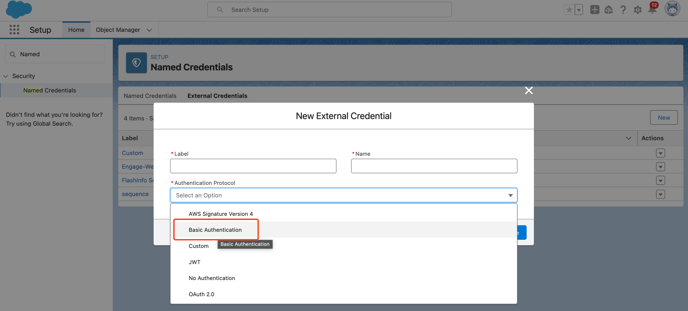
- Create an External Credentials, and choose Basic Authentication as the encryption method.
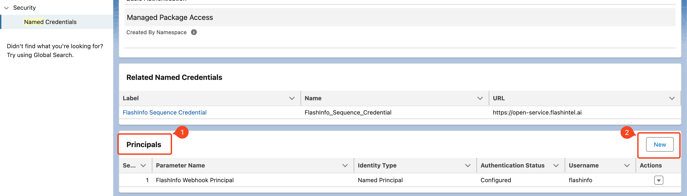
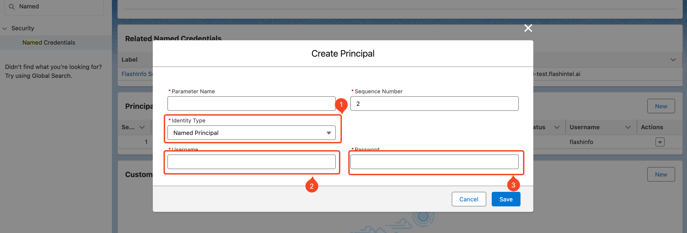
- Click on the created "External Credentials", create a Principal, use the Key name provided by FlashInfo as the Username, and use the Key value provided by FlashInfo as the Password.
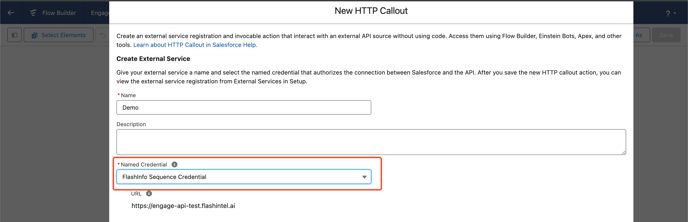
- Create a Named Credential, fill in the URL with the Webhook URL provided by FlashInfo (remove the content after the first "/"), and associate it with the External Credentials created earlier.

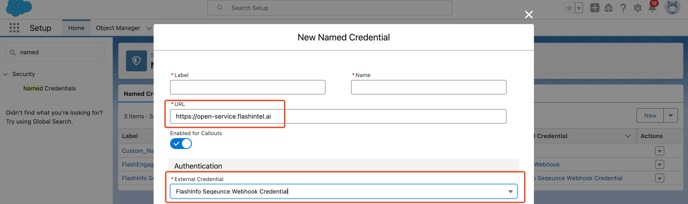
It should be noted that the URL is not the complete Webhook URL, only the domain part is needed, and the content after "/" should not be filled in.
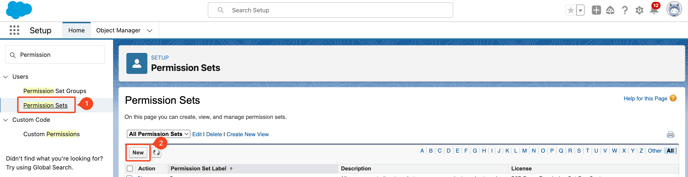
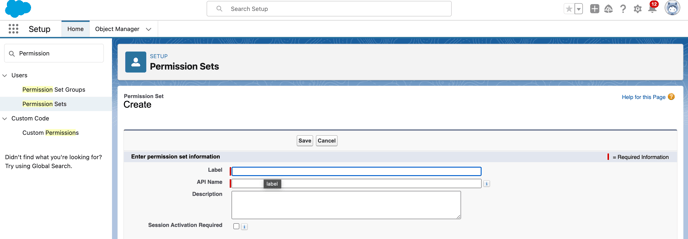
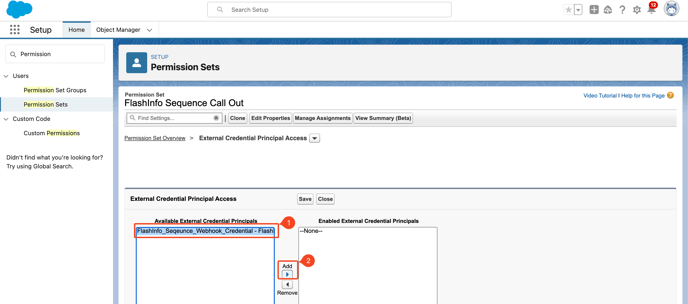
- Create a Permission Set
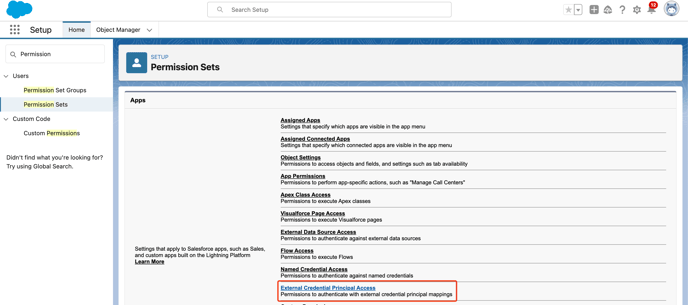
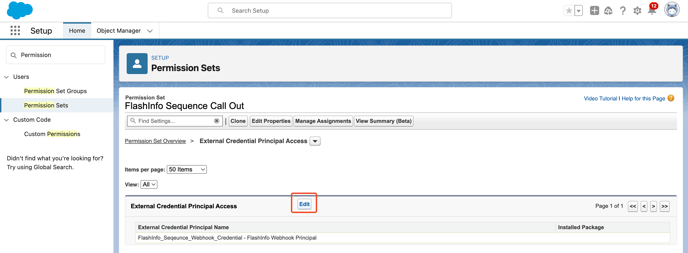
- Click on the created "Permission Set", set External Credential Principal Access
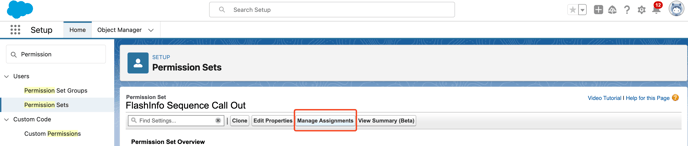
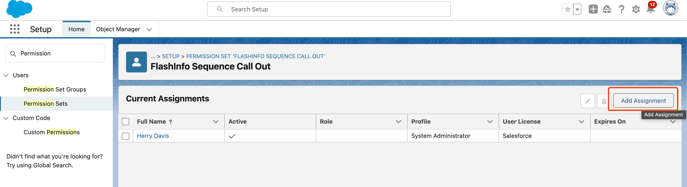
- Assign users who can use in the Permission Set.
After creating the Credential, you can configure the Flows that you need to use.
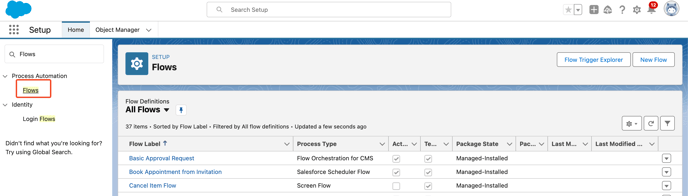
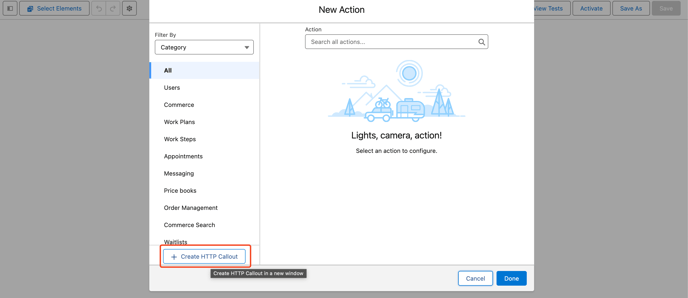
- Select to add an Action

- Create an HTTP callout
- Set the method to Post and copy the content after the first "/" from FlashInfo as the URL Path.
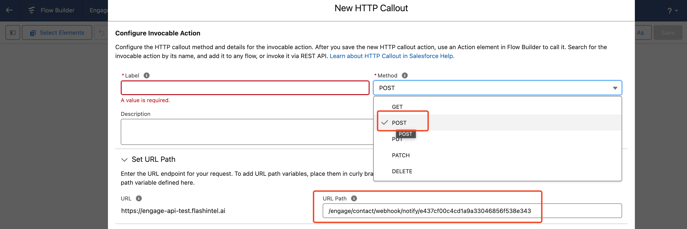
Other configurations can be set according to your own requirements.
Setting up in your custom platform
If you want to push contacts to Engage from your platform using a webhook, you just need the encryption method in the main header and a request body that fulfills the requirements.
- Method
Post
- Authentication Protocol
In the request Headers, the Authorization header passes the API a Base64 encoded string representing your key name and key value, appended to the text Basic as follows:
Basic <Base64 encoded key name and key value>
- Request Body
{"First Name": "firstName","Last Name": "lastName","Company Name": "companyName","Job Title": "jobTitle","Email Address": "emailAddress","Phone Number": "phoneNumber","Contact State": "contactState","Contact Country": "contactCountry","Company State": "companyState","Company Country": "companyCountry","Founded Year": "foundedYear","Industry": "industry","Employees": "employees","Website": "website","LinkedIn": "linkedInURL","CrmId": "crmId"}Thirdly, push a test data and map fields
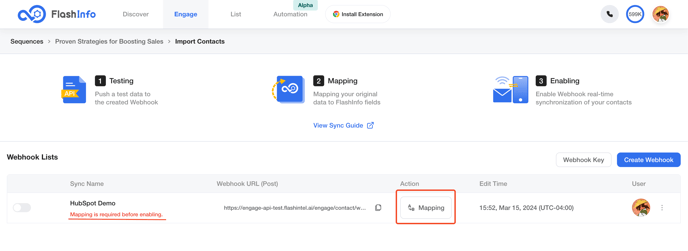
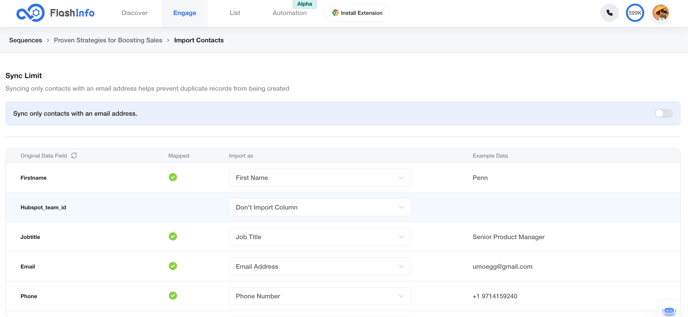
Once you configured the Workflow, push a test data to FlashInfo. After the successful push, enter the FlashInfo Webhook management page and map the fields you need to use.
- If the Test Data is pushed successfully, you can see that mapping can be edit on the Webhook management page.
- On the Mapping page, you can set up mapping based on the fields included in the test data you push.
- If you are using a CRM, the CRM ID must be mapped.
- First Name and Last Name must also be mapped.
- At least one of the following must be mapped: LinkedIn URL, Email Address, or Phone Number.
Finally, activate your webhook.
After sending the Test Data and mapping the fields, you can activate your webhook.
Once the Webhook is opened, contacts that meet the Workflow criteria will be pushed in real time to the Sequence you are using, and contact information will be stored according to your mapping.
