Step 1: Access the Sequence Menu
- Click on the "Sequence" menu within FlashInfo Engage.
Step 2: Select a Sequence
- Choose the desired sequence from the list of available sequences.
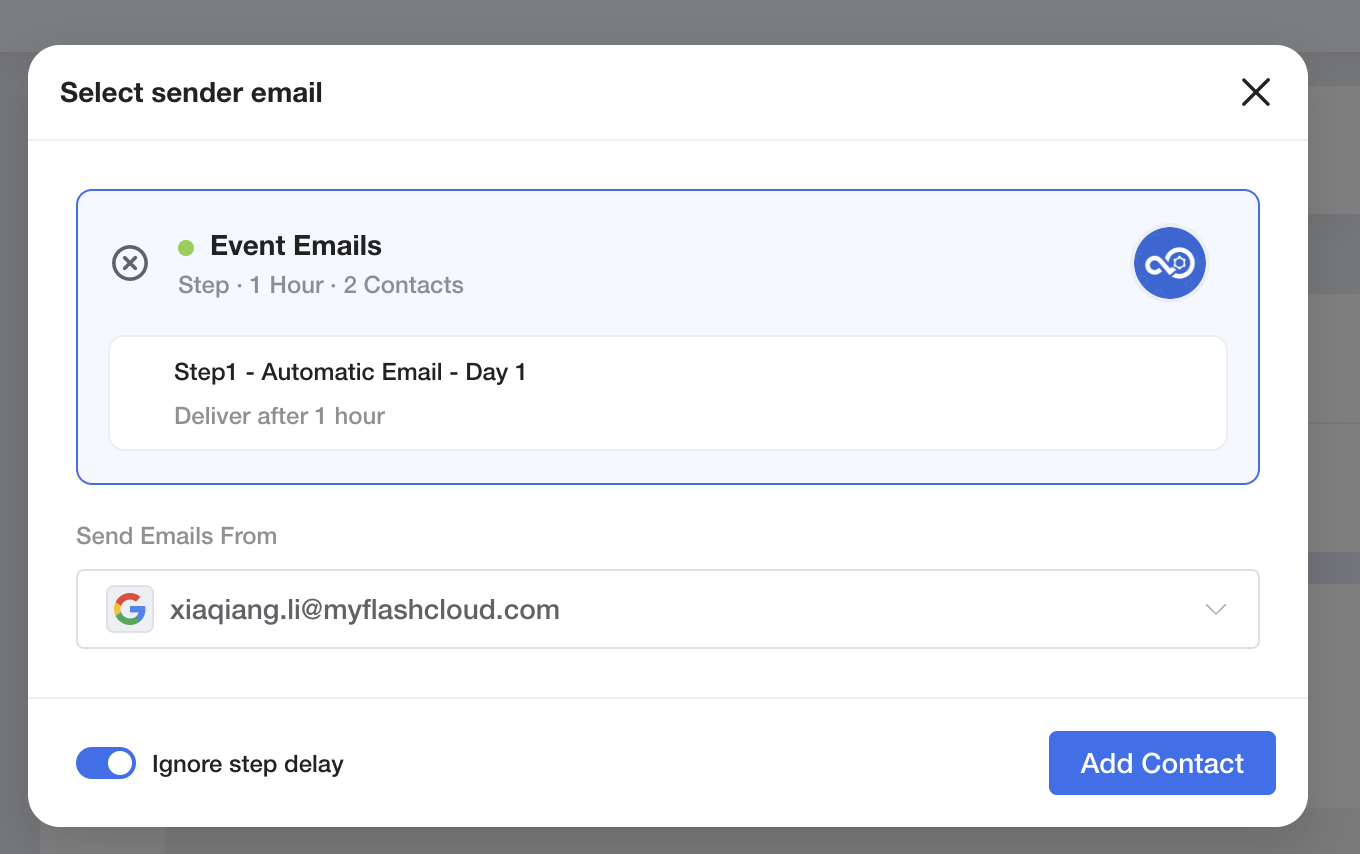
Step 3: Select a Sender's Email
- Pick the email account that will be used for sending messages within the sequence.
Step 4: Add Contacts to the Sequence
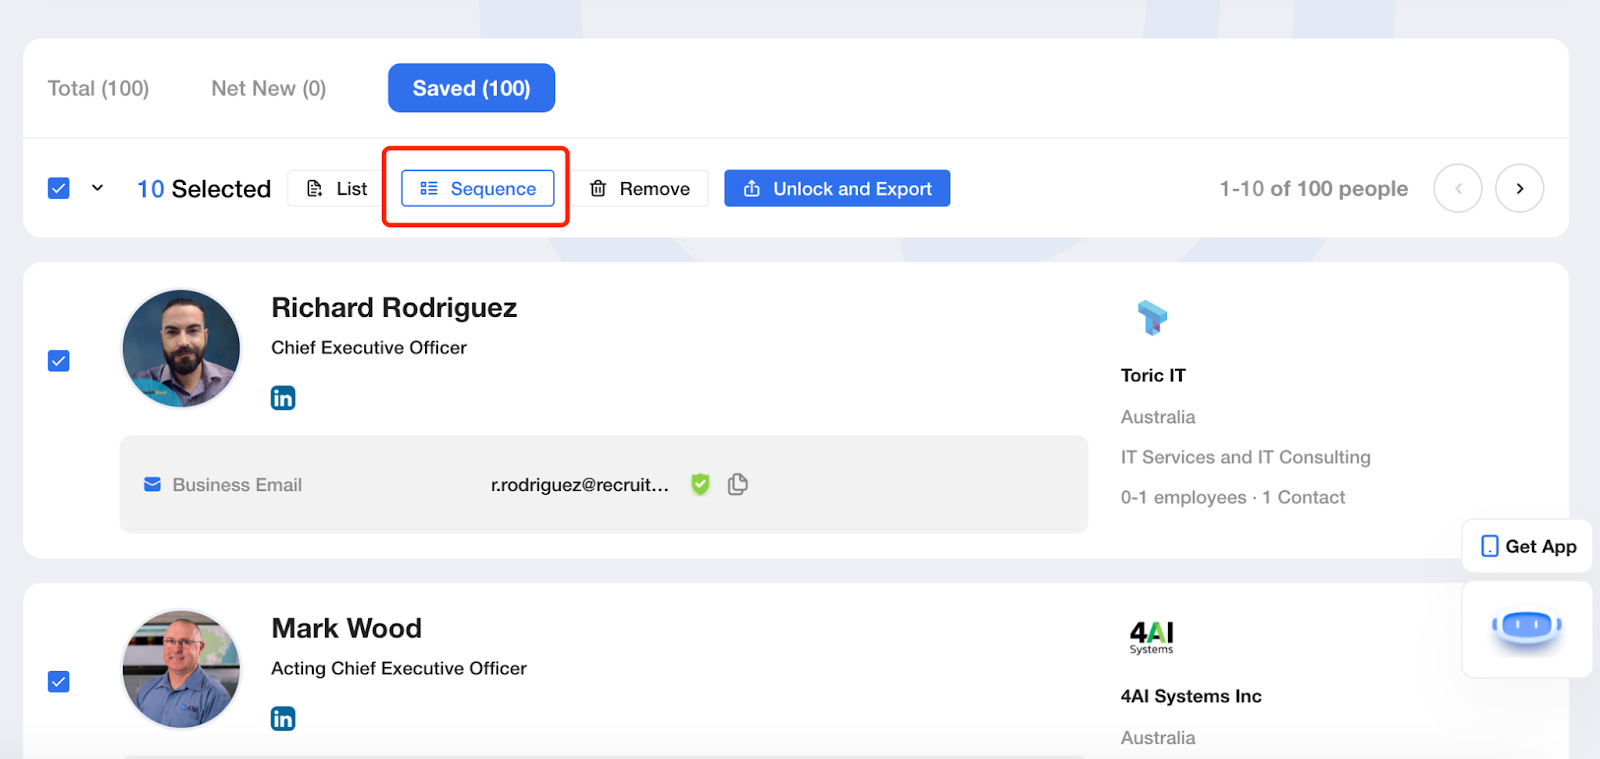
- On the search page or list page, select the unlocked contacts. A "Sequence" button will appear.
- Click on the "Sequence" button and choose the sequence you wish to add the contacts to.
- The selected contacts will be added to the sequence.

Step 5: Review Added Contacts
- Navigate to the sequence details page to view all the contacts added to the sequence.

By following these steps, you will be able to add contacts to a sequence in FlashInfo Engage, allowing you to efficiently engage with prospects using the configured steps and settings.