Importing an individual lead or contact from your Salesforce to FlashInfo
Follow these steps to import an individual lead or contact from Salesforce to FlashInfo:
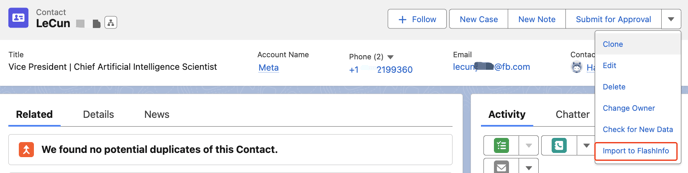
- Navigate to the detailed lead or contact record you wish to import into FlashInfo.
- Click the "Import to FlashInfo" button.
Contacts View

Contact Detail View
Leads View

Lead Detail View

Configure a Custom Button Inside Salesforce
Easily import data directly from Salesforce using the FlashInfo Custom Button. This feature supports imports from both Leads and Contacts within Salesforce. In this guide, we'll walk you through the button creation process step-by-step.
Heads up:
Some Salesforce site settings might block the import button from launching the FlashInfo import window. If this happens, ensure that pop-ups and redirects are permitted in your security settings.
Step-by-step Introduction:
Pre-requisites:
- A Salesforce account with administrative rights.
- FlashInfo integration set up with Salesforce.
Steps:
- Log into Salesforce: Access your Salesforce account.
The Custom Import Button for Lead View:
- Navigate to Setup: Click on the gear icon in the top right corner and select 'Setup'.
- Customize Objects: Under the "Objects and Fields" section, select "Object Manager".
- Select the Relevant Object: Find and click on the object you want to add the import button to, for example, "Leads".
- Buttons, Links, and Actions: In the object details page, find the "Buttons, Links, and Actions" section and click on it.
- New Button or Link: Click on the "New Button or Link" button at the top of the page.

-
Label: Enter a name, e.g., "Import to FlashInfo".
-
Name: importtoflashinfo
-
Display Type: Choose "List Button".
-
Behavior: Choose third one "Display in existing window without sidebar or header"
-
Content Source: Choose " URL" Copy URL into Text Bar: https://discover-api.flashintel.ai/api/v2/salesforce/export?type=leads&account={!$User.Email}
-
Save: Once you've configured the button, click "Save".
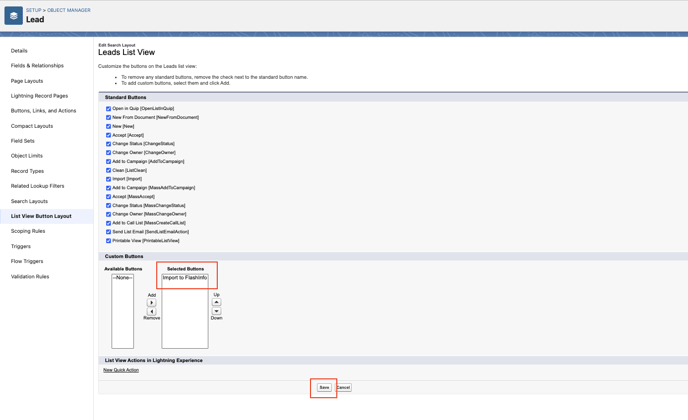
Go Back To Object Manager
-
Click List View Button Layout
-
Save this action
Lead Details Page
-
Label: Enter a name, e.g., "Import to FlashInfo".
-
Name: Import_to_FlashInfo
-
Display Type: Choose "Detail Page Link".
-
Behavior: Display in a new window
-
Content Source: URL
Copy URL into Text Bar:
https://discover-api.flashintel.ai/api/v2/salesforce/export?type=leads&account={!$User.Username}&id={!Lead.Id}
-
Save: Once you've configured the button, click "Save".
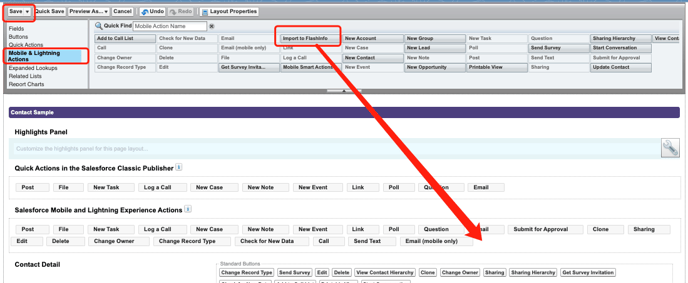
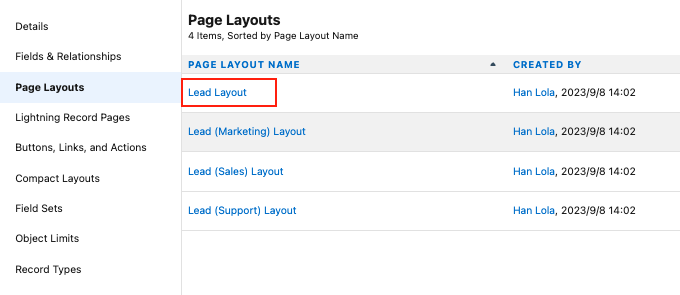
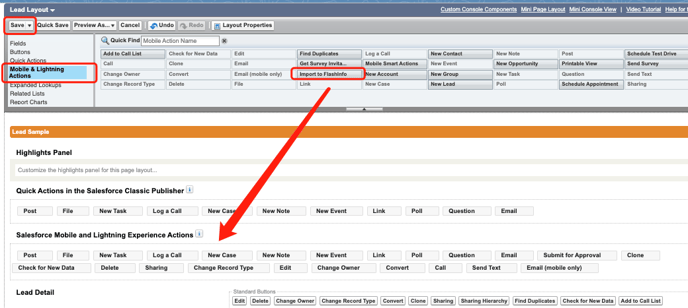
Add Button to Page Layout:
Hover to Page Layout, choose the first option
-
Choose " Mobile & Lightning"
-
Drag "Import to FlashInfo" into Salesforce Mobile and Lightning Experience Actions session
-
Click Save.
Once finished above action, you can manually import data into FlashInfo.

The Custom Import Button for Contact View
-
Navigate to Setup: Click on the gear icon in the top right corner and select 'Setup'.
-
Customize Objects: Under the "Objects and Fields" section, select "Object Manager".
-
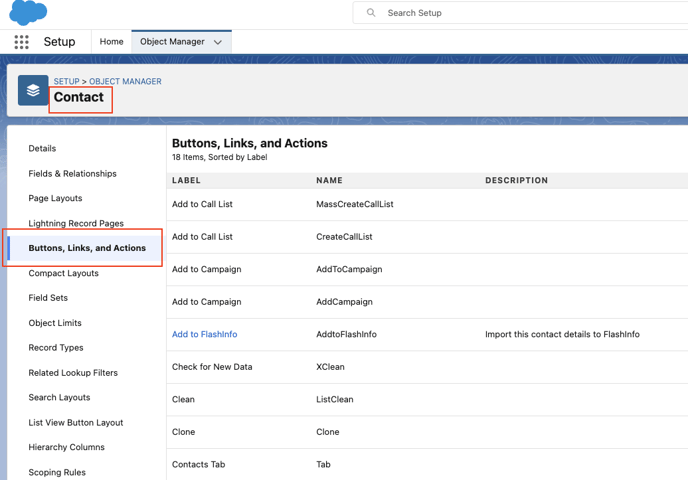
Select the Relevant Object: Find and click on the object you want to add the import button to. For example, "Contacts".
-
Buttons, Links, and Actions: In the object details page, find the "Buttons, Links, and Actions" section and click on it.
-
New Button or Link: Click on the "New Button or Link" button at the top of the page.
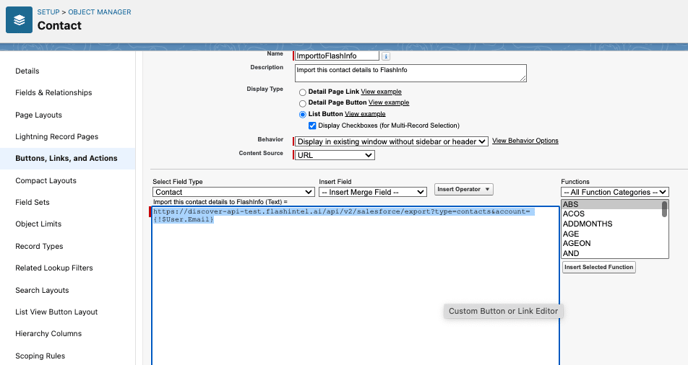
Configure the Button:
-
Label: Enter a name, "Import to FlashInfo".
-
Name: ImporttoFlashInfo
-
Display Type: Choose "List Button".
-
Behavior: Choose third one "Display in existing window without sidebar or header"
-
Content Source: URL
Copy URL into text bar:
https://discover-api.flashintel.ai/api/v2/salesforce/export?type=contacts&account={!$User.Email}
- Save: Click "Save".
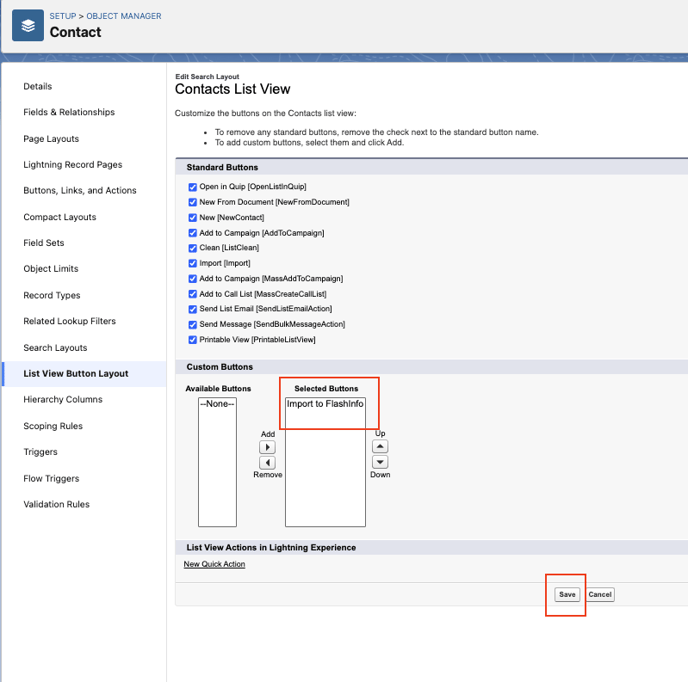
- Same, don't forget hover to List View Button Layout.
- Add " Import to FlashInfo" into Selected Buttons session.
- Click Save
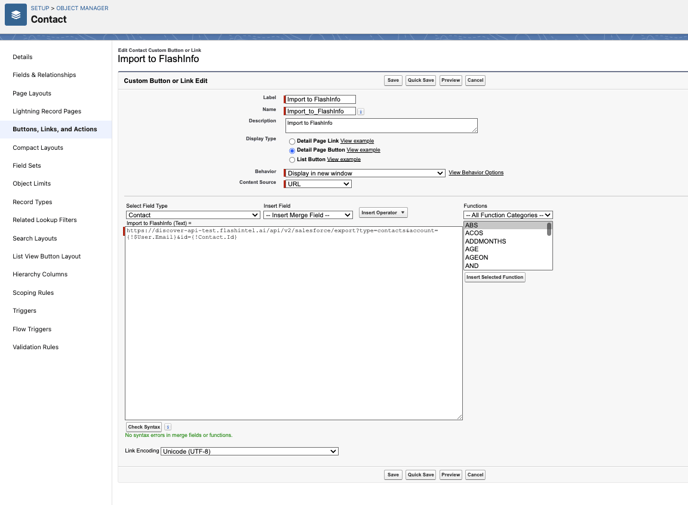
Contact Detail Page
-
Hove to "New Button or Link":
Click on the "New Button or Link" button at the top of the page. Create a new button here again:

-
Configure the Button:
-
Label: Enter a name, e.g., "Import to FlashInfo".
-
Name: Import_to_FlashInfo
-
Display Type: Choose "Detail Page Button".
-
Behavior: Display in a new window
-
Content Source: URL
Copy URL into Text Bar:
-
Save:
Once you've configured the button, click "Save".
Add Button to Page Layout:
Hover to Page Layout, choose the first option

-
Choose " Mobile & Lightning"
-
Drag "Import to FlashInfo" into Salesforce Mobile and Lightning Experience Actions session
-
Click Save.